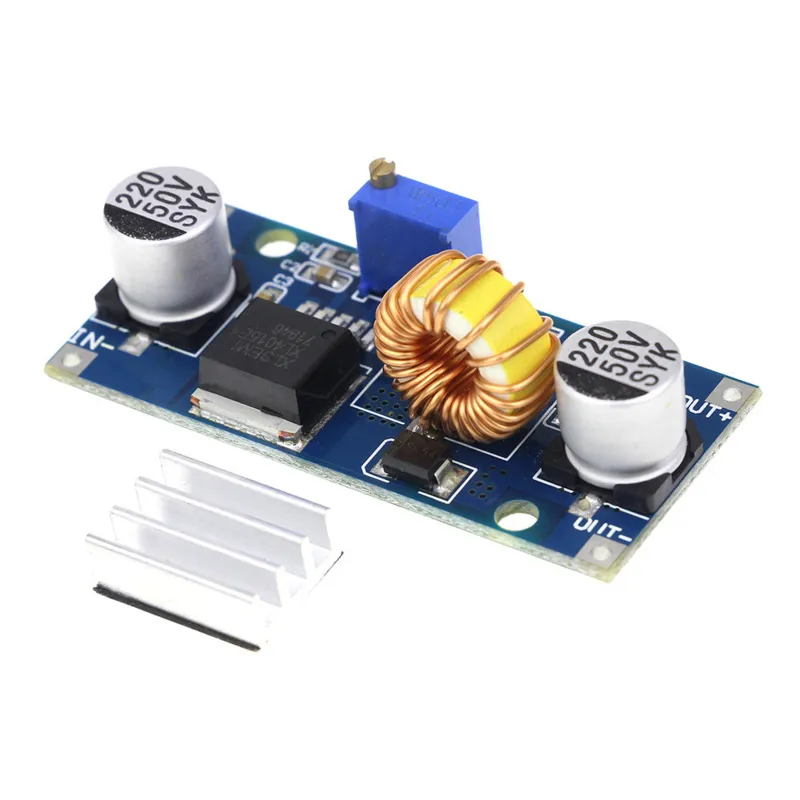
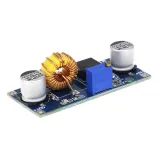
SKU: OT2004-A113 Αριθμός είδους: AA270 EAN: 8179262862427

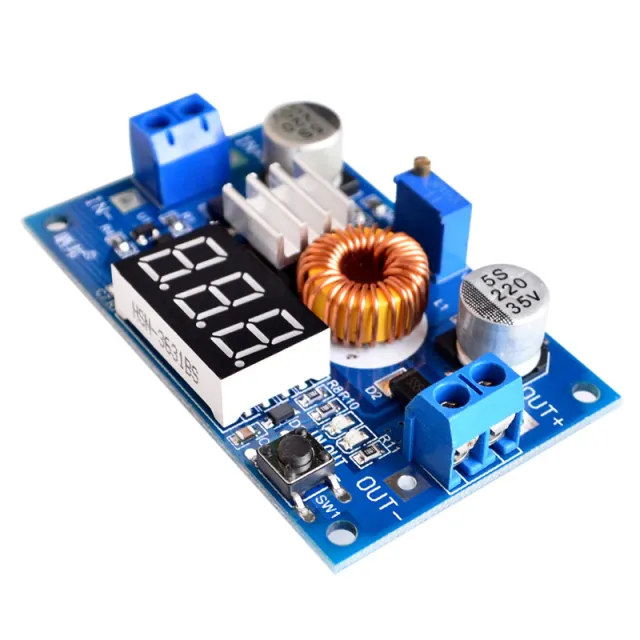
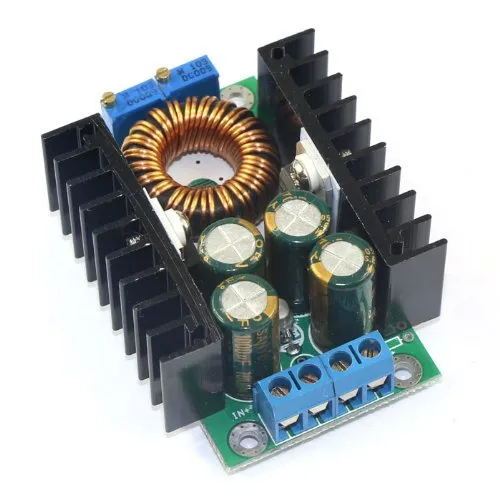
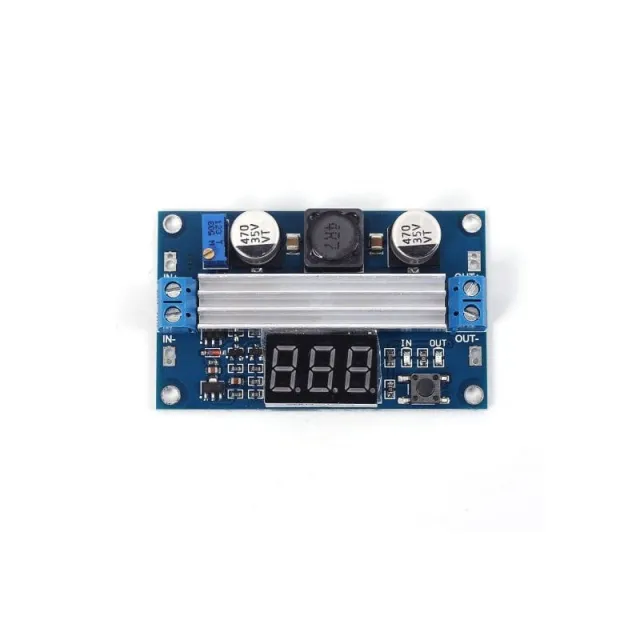
Τάση εισόδου 4-38VDC
Τάση εξόδου 1.25-36VDC, ρυθμιζόμενη
Ισχύς εξόδου 0-5A, με προστασία βραχυκυκλώματος εξόδου.
Μέγιστη έξοδος 75W με θερμική προστασία
Περιλαμβάνει heat sink το οποίο παρέχεται μη συναρμολογημένο. Μπορεί να στερεωθεί με την προσαρτημένη ταινία 3M.
Διαστάσεις
Μήκος: 5,4cm
Πλάτος: 2,45cm
Ύψος: 1,7cm
Έτσι συνδέεις το Ρυθμιζόμενο Step-down Module 4~38V 5A 96% Υψηλή Απόδοση XL4015 σε ένα Arduino UNO ή ESP32, με ένα παράδειγμα sketch που μπορείς να ανεβάσεις αμέσως.
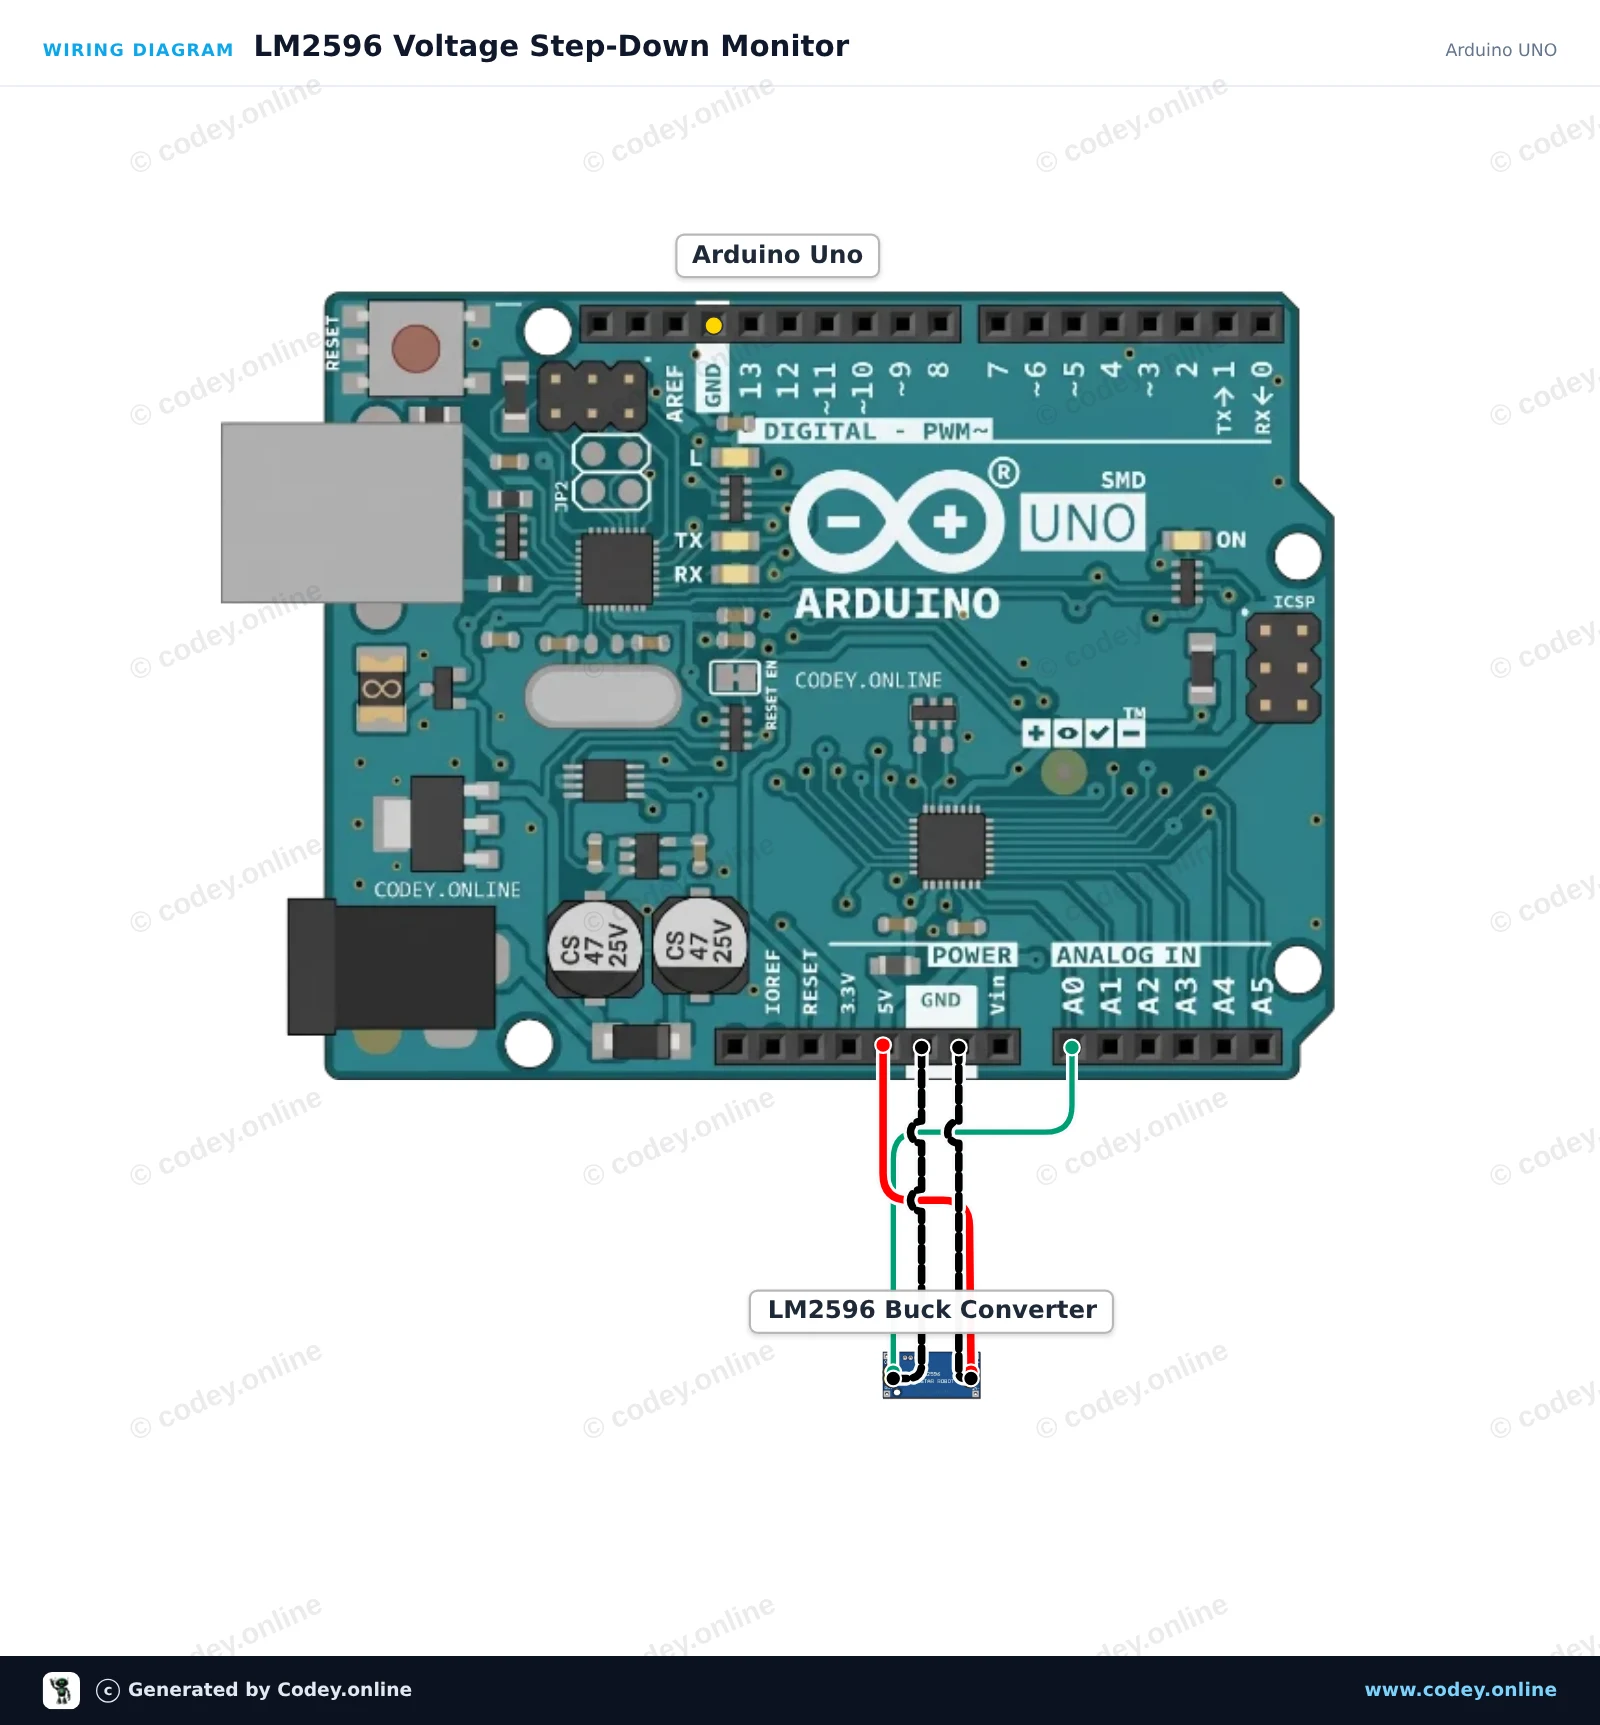
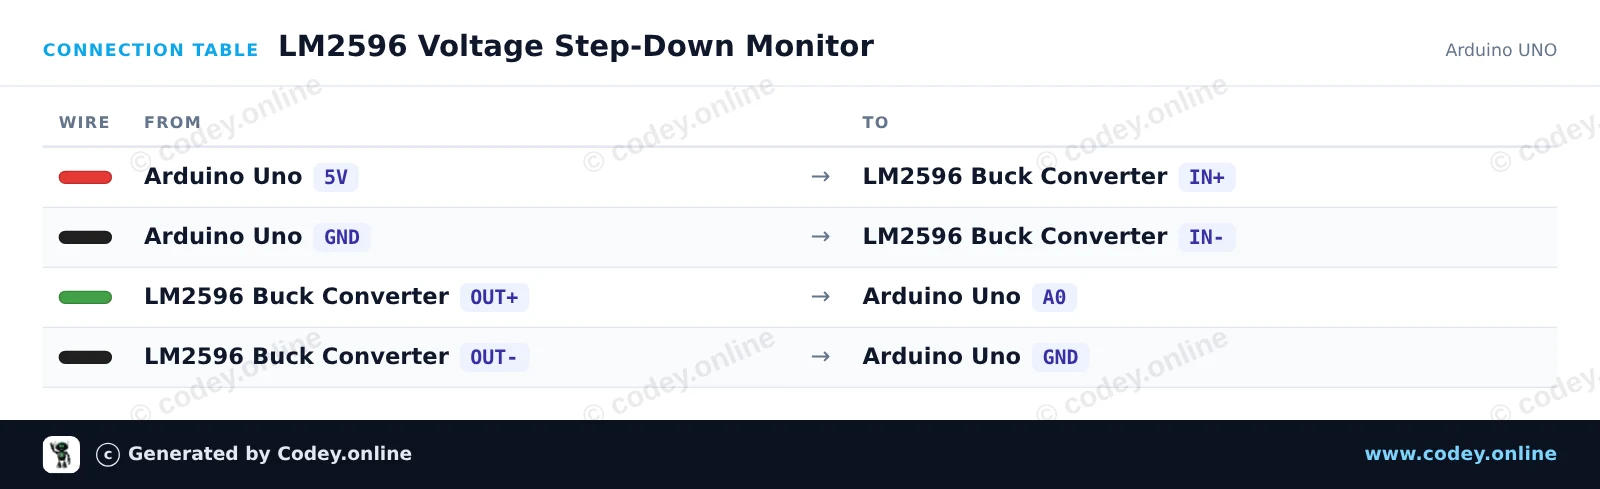
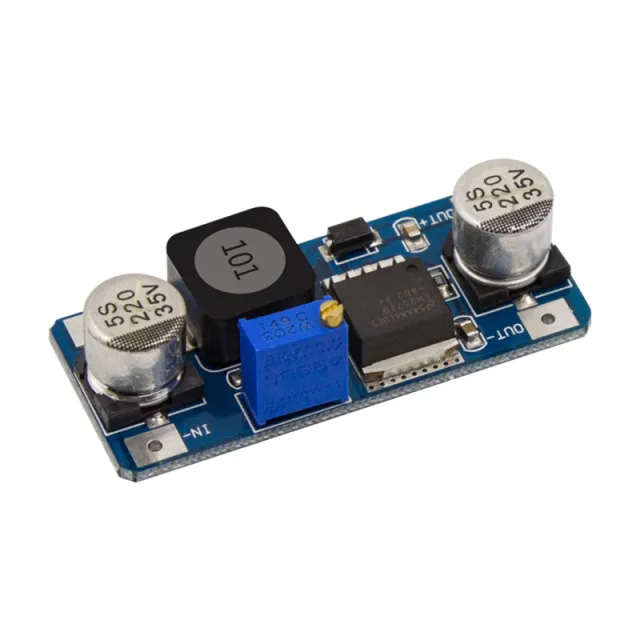
Αυτό το έργο τροφοδοτεί το module step-down LM2596 από τη γραμμή 5V του Arduino και μετρά τη ρυθμιζόμενη τάση εξόδου του στην αναλογική ακίδα A0. Ρύθμισε το ενσωματωμένο ποτενσιόμετρο με ένα μικρό κατσαβίδι για να παρακολουθείς σε πραγματικό χρόνο τις αλλαγές τάσης που εμφανίζονται στο Serial Monitor (διατήρησε την έξοδο κάτω από 5V).
/*
 * ==================================================================
 *  Generated by Codey.online  —  https://www.codey.online
 * ==================================================================
 *  Project   : LM2596 Voltage Step-Down Monitor
 *  Board     : Arduino UNO (arduino:avr:uno)
 *  Parts     : Adjustable Step-down Module 3-40VDC 1.5-35VDC LM2596
 *  Libraries : none (built-in)
 *
 *  Codey Online is an AI-powered browser IDE for Arduino and ESP32.
 *  Describe your project and Codey writes the code, draws the wiring
 *  diagram and uploads it to your board, straight from the browser.
 *  This code is free to use, modify and share, without warranty.
 * ==================================================================
 */

const int voltagePin = A0;

void setup() {
  Serial.begin(115200);
  while (!Serial) {
    ; // Wait for serial port to connect
  }
  Serial.println(F("LM2596 Step-Down Voltage Monitor"));
  Serial.println(F("Turn the onboard trimmer to adjust the output voltage (0-5V)."));
}

void loop() {
  int rawValue = analogRead(voltagePin);
  float voltage = rawValue * (5.0 / 1023.0);

  Serial.print(F("ADC Value: "));
  Serial.print(rawValue);
  Serial.print(F(" | Output Voltage: "));
  Serial.print(voltage, 2);
  Serial.println(F(" V"));

  delay(500);
}Wiring diagram and example code generated by Codey.online — https://www.codey.online
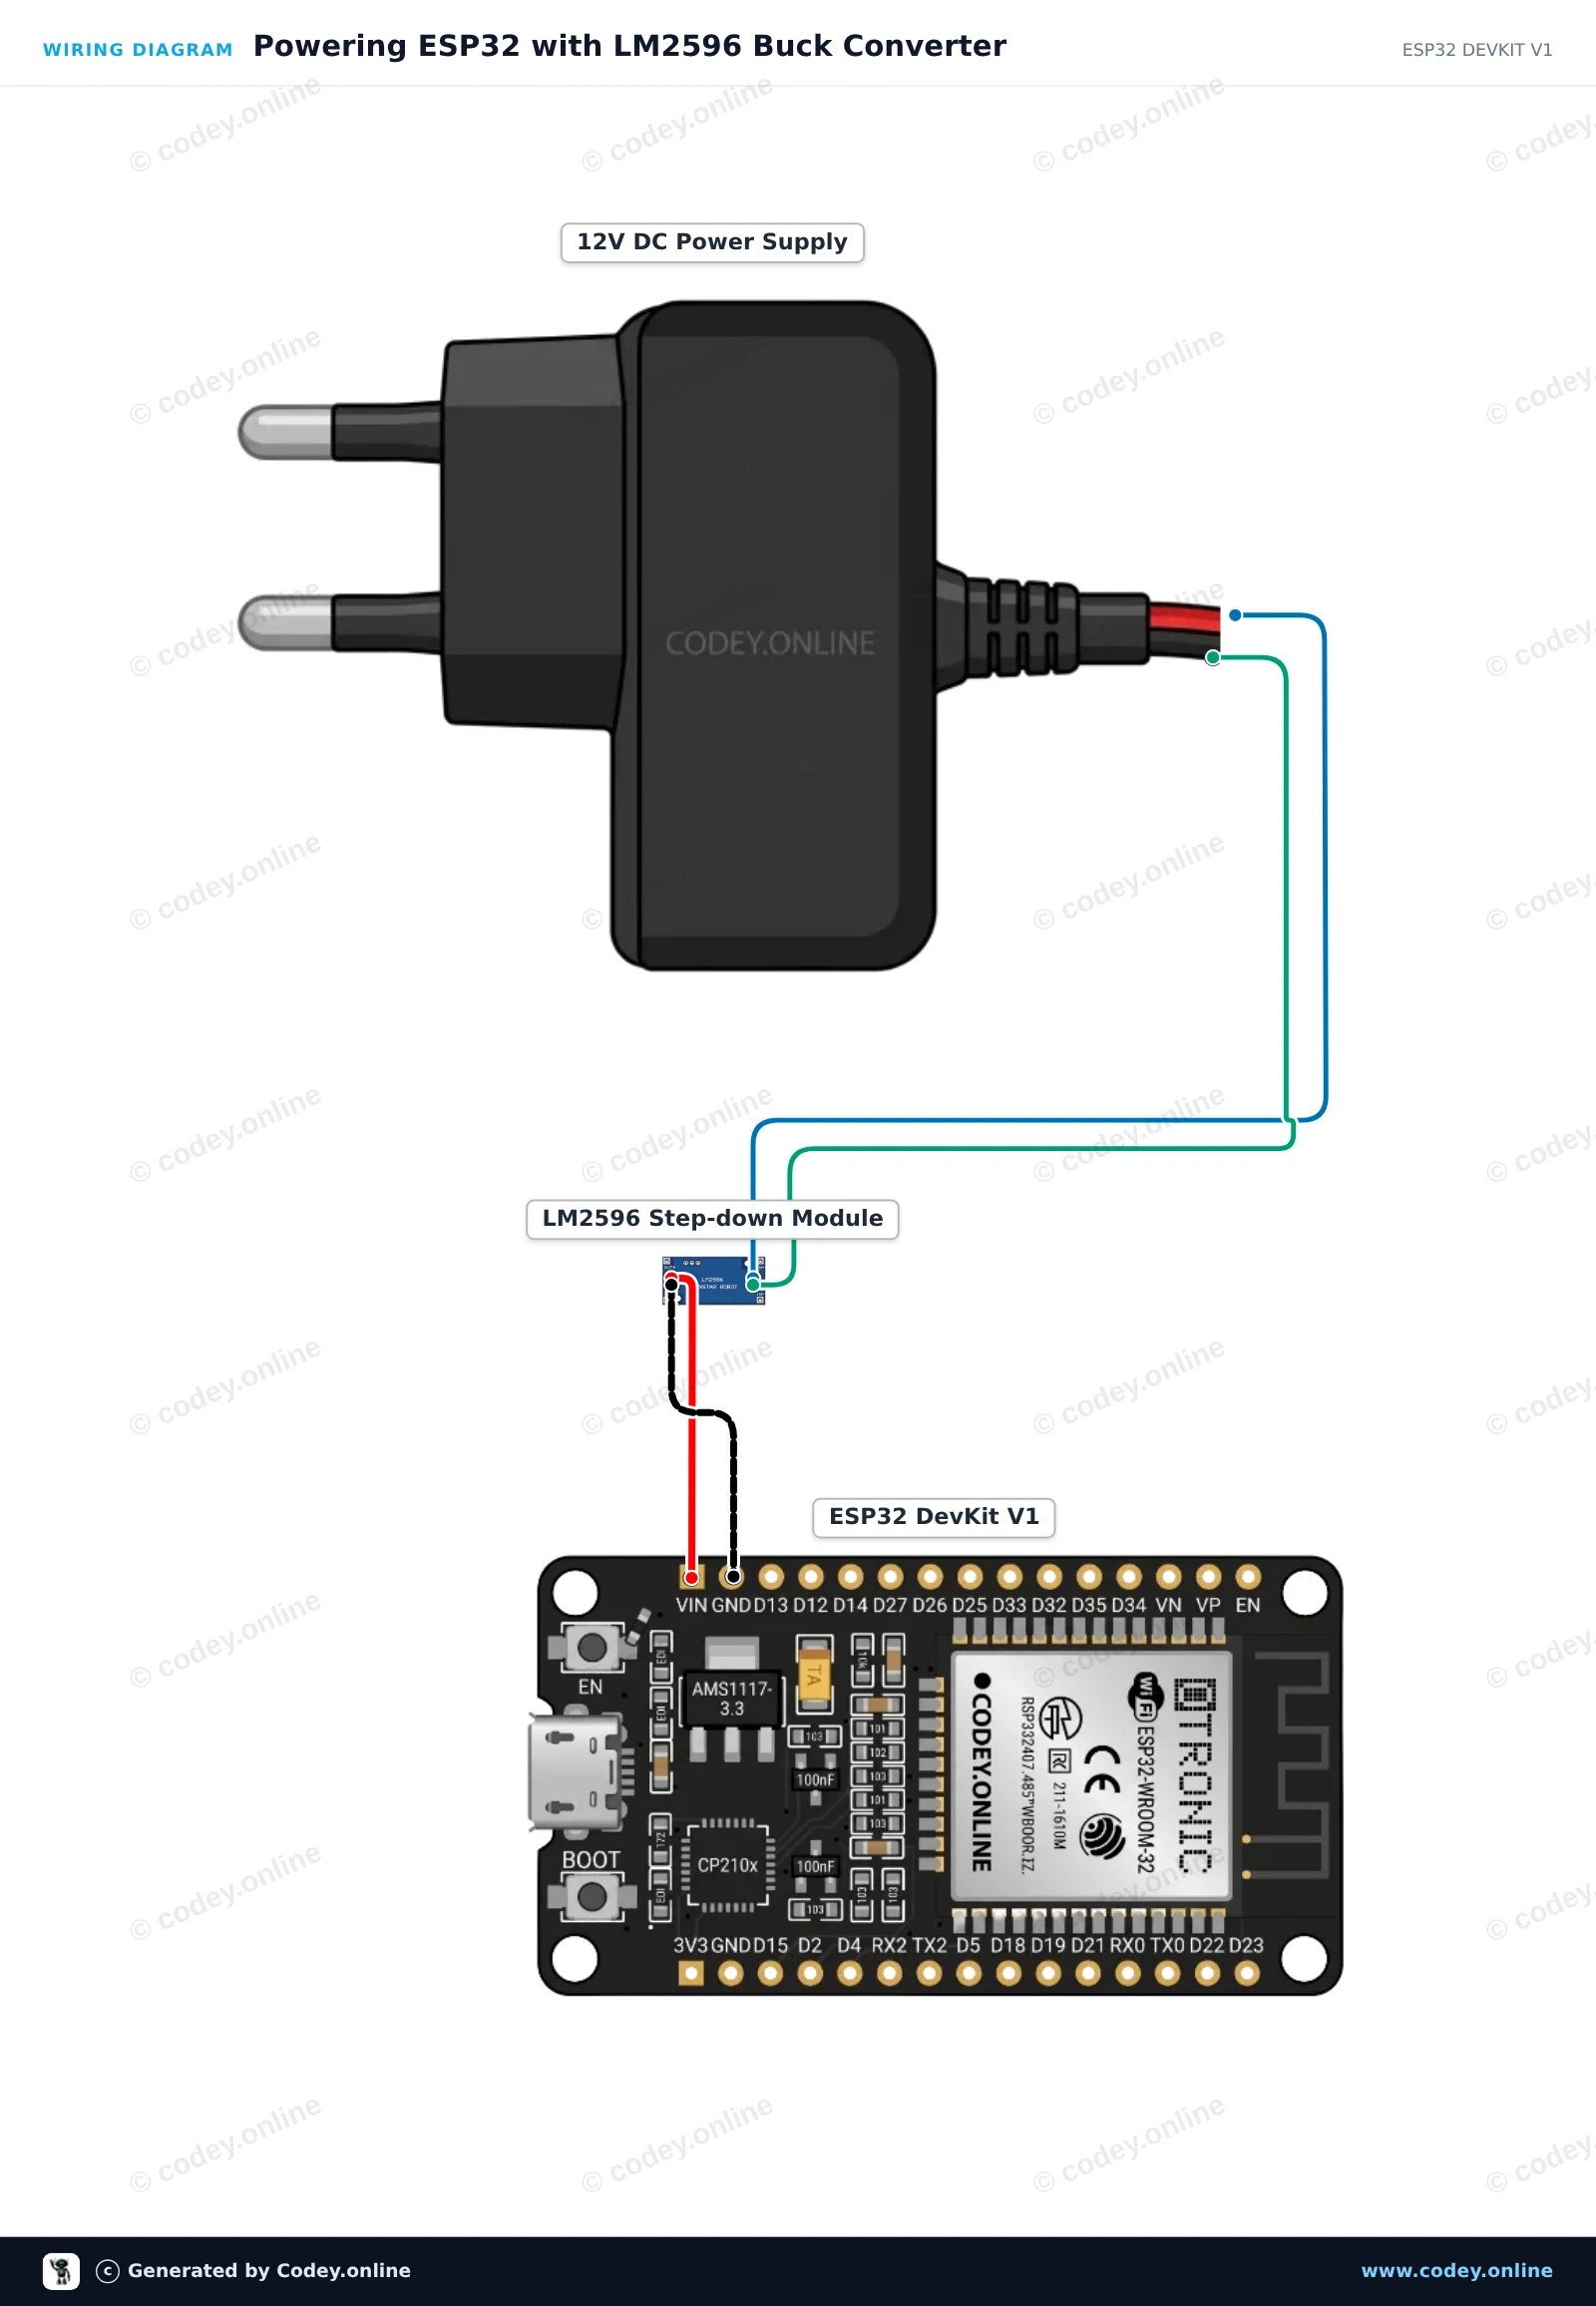
Πριν συνδέσετε το ESP32, χρησιμοποιήστε ένα πολύμετρο για να ρυθμίσετε το trimmer potentiometer του LM2596 μέχρι το OUT+ να δείχνει ακριβώς 5.0V. Η μονάδα κατεβάζει αποδοτικά την είσοδο 12V σε σταθερή έξοδο 5V για να τροφοδοτήσει το ESP32 μέσω των VIN και GND. Όταν συνδεθεί, το ESP32 εκκινεί, αναβοσβήνει το ενσωματωμένο LED κατάστασης και στέλνει heartbeat μηνύματα μέσω Serial.
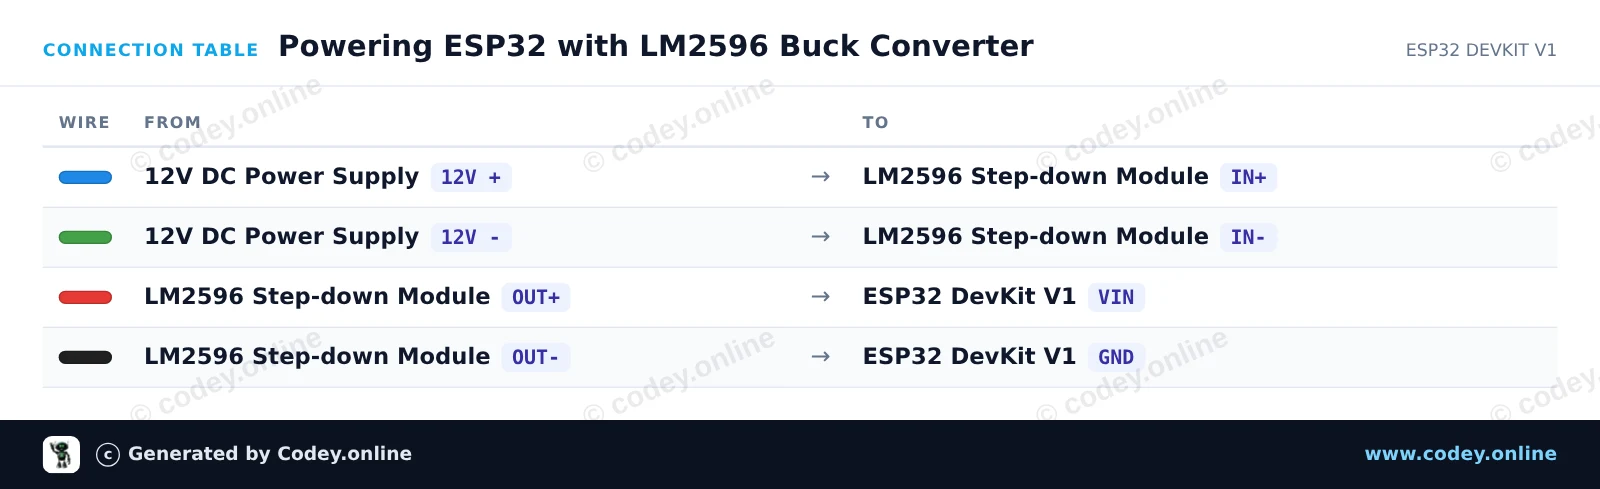
/*
 * ==================================================================
 *  Generated by Codey.online  —  https://www.codey.online
 * ==================================================================
 *  Project   : Powering ESP32 with LM2596 Buck Converter
 *  Board     : ESP32 DEVKIT V1 (esp32:esp32:esp32doit-devkit-v1)
 *  Parts     : Adjustable Step-down Module 3-40VDC 1.5-35VDC LM2596
 *  Libraries : none (built-in)
 *
 *  Codey Online is an AI-powered browser IDE for Arduino and ESP32.
 *  Describe your project and Codey writes the code, draws the wiring
 *  diagram and uploads it to your board, straight from the browser.
 *  This code is free to use, modify and share, without warranty.
 * ==================================================================
 */

// LM2596 Step-Down Buck Converter ESP32 Power Demo
// Note: Always adjust LM2596 output to 5V before connecting to VIN!

const int LED_PIN = 2; // Onboard LED

void setup() {
  Serial.begin(115200);
  pinMode(LED_PIN, OUTPUT);

  Serial.println("LM2596 Step-Down Buck Converter Demo");
  Serial.println("ESP32 successfully running on regulated 5V power!");
}

void loop() {
  // Turn LED on
  digitalWrite(LED_PIN, HIGH);
  Serial.print("Uptime: ");
  Serial.print(millis() / 1000);
  Serial.println(" s | Power Status: OK (LED ON)");
  delay(500);

  // Turn LED off
  digitalWrite(LED_PIN, LOW);
  delay(500);
}Wiring diagram and example code generated by Codey.online — https://www.codey.online





 English
  Nederlands
  Frans
Frans  Deutsch
  Italiano
  Español
  Suomi
Suomi  Polski
  Dansk
Dansk  Български
  Čeština
  Hrvatski
  Svenska
  Aileen