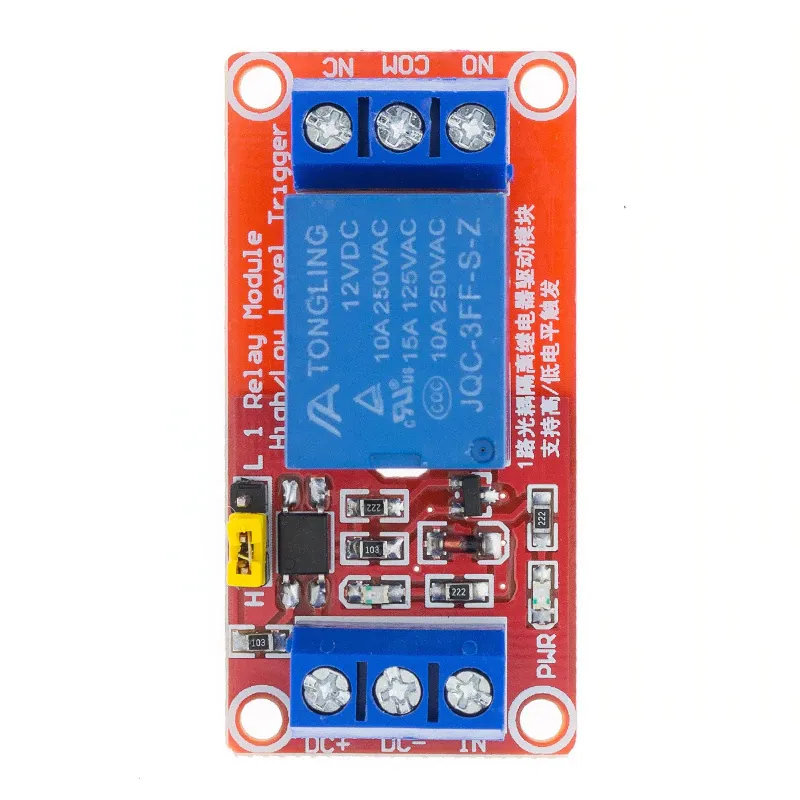
SKU: OT901-C111 Αριθμός είδους: BA050 EAN: 5408955714471

Λέξεις-κλειδιά: 12v relais, relais 12v, relay 12v, 12v relay
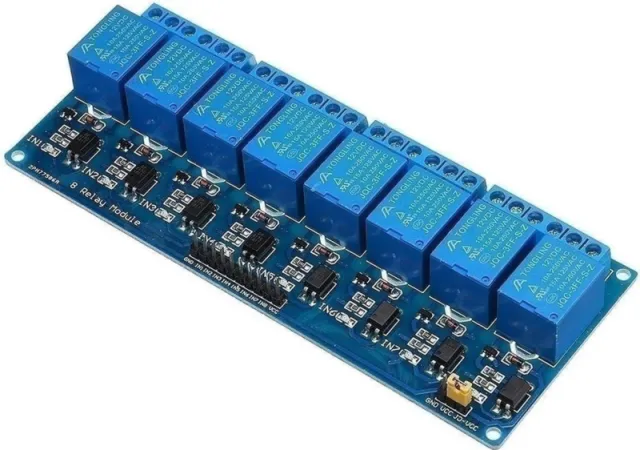
Διαστάσεις
Μήκος: 5,1cm
Πλάτος: 2,54cm
Ύψος: 1,9cm
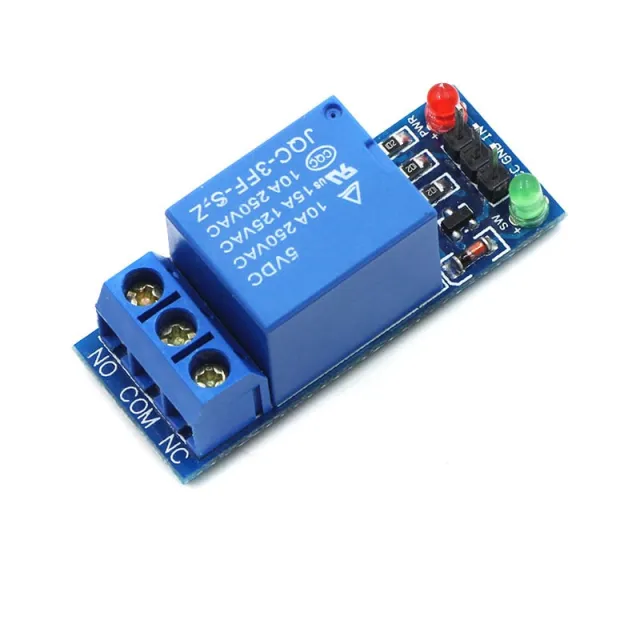
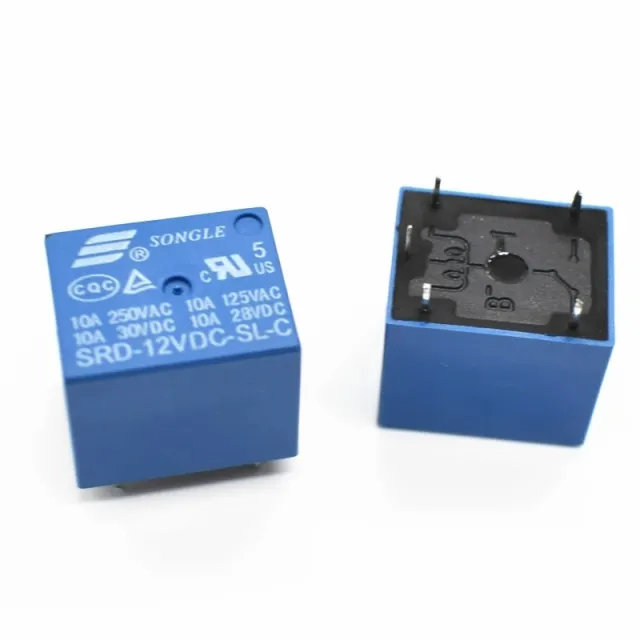
Έτσι συνδέεις το Μονάδα ρελέ 12v σε ένα Arduino UNO ή ESP32, με ένα παράδειγμα sketch που μπορείς να ανεβάσεις αμέσως.
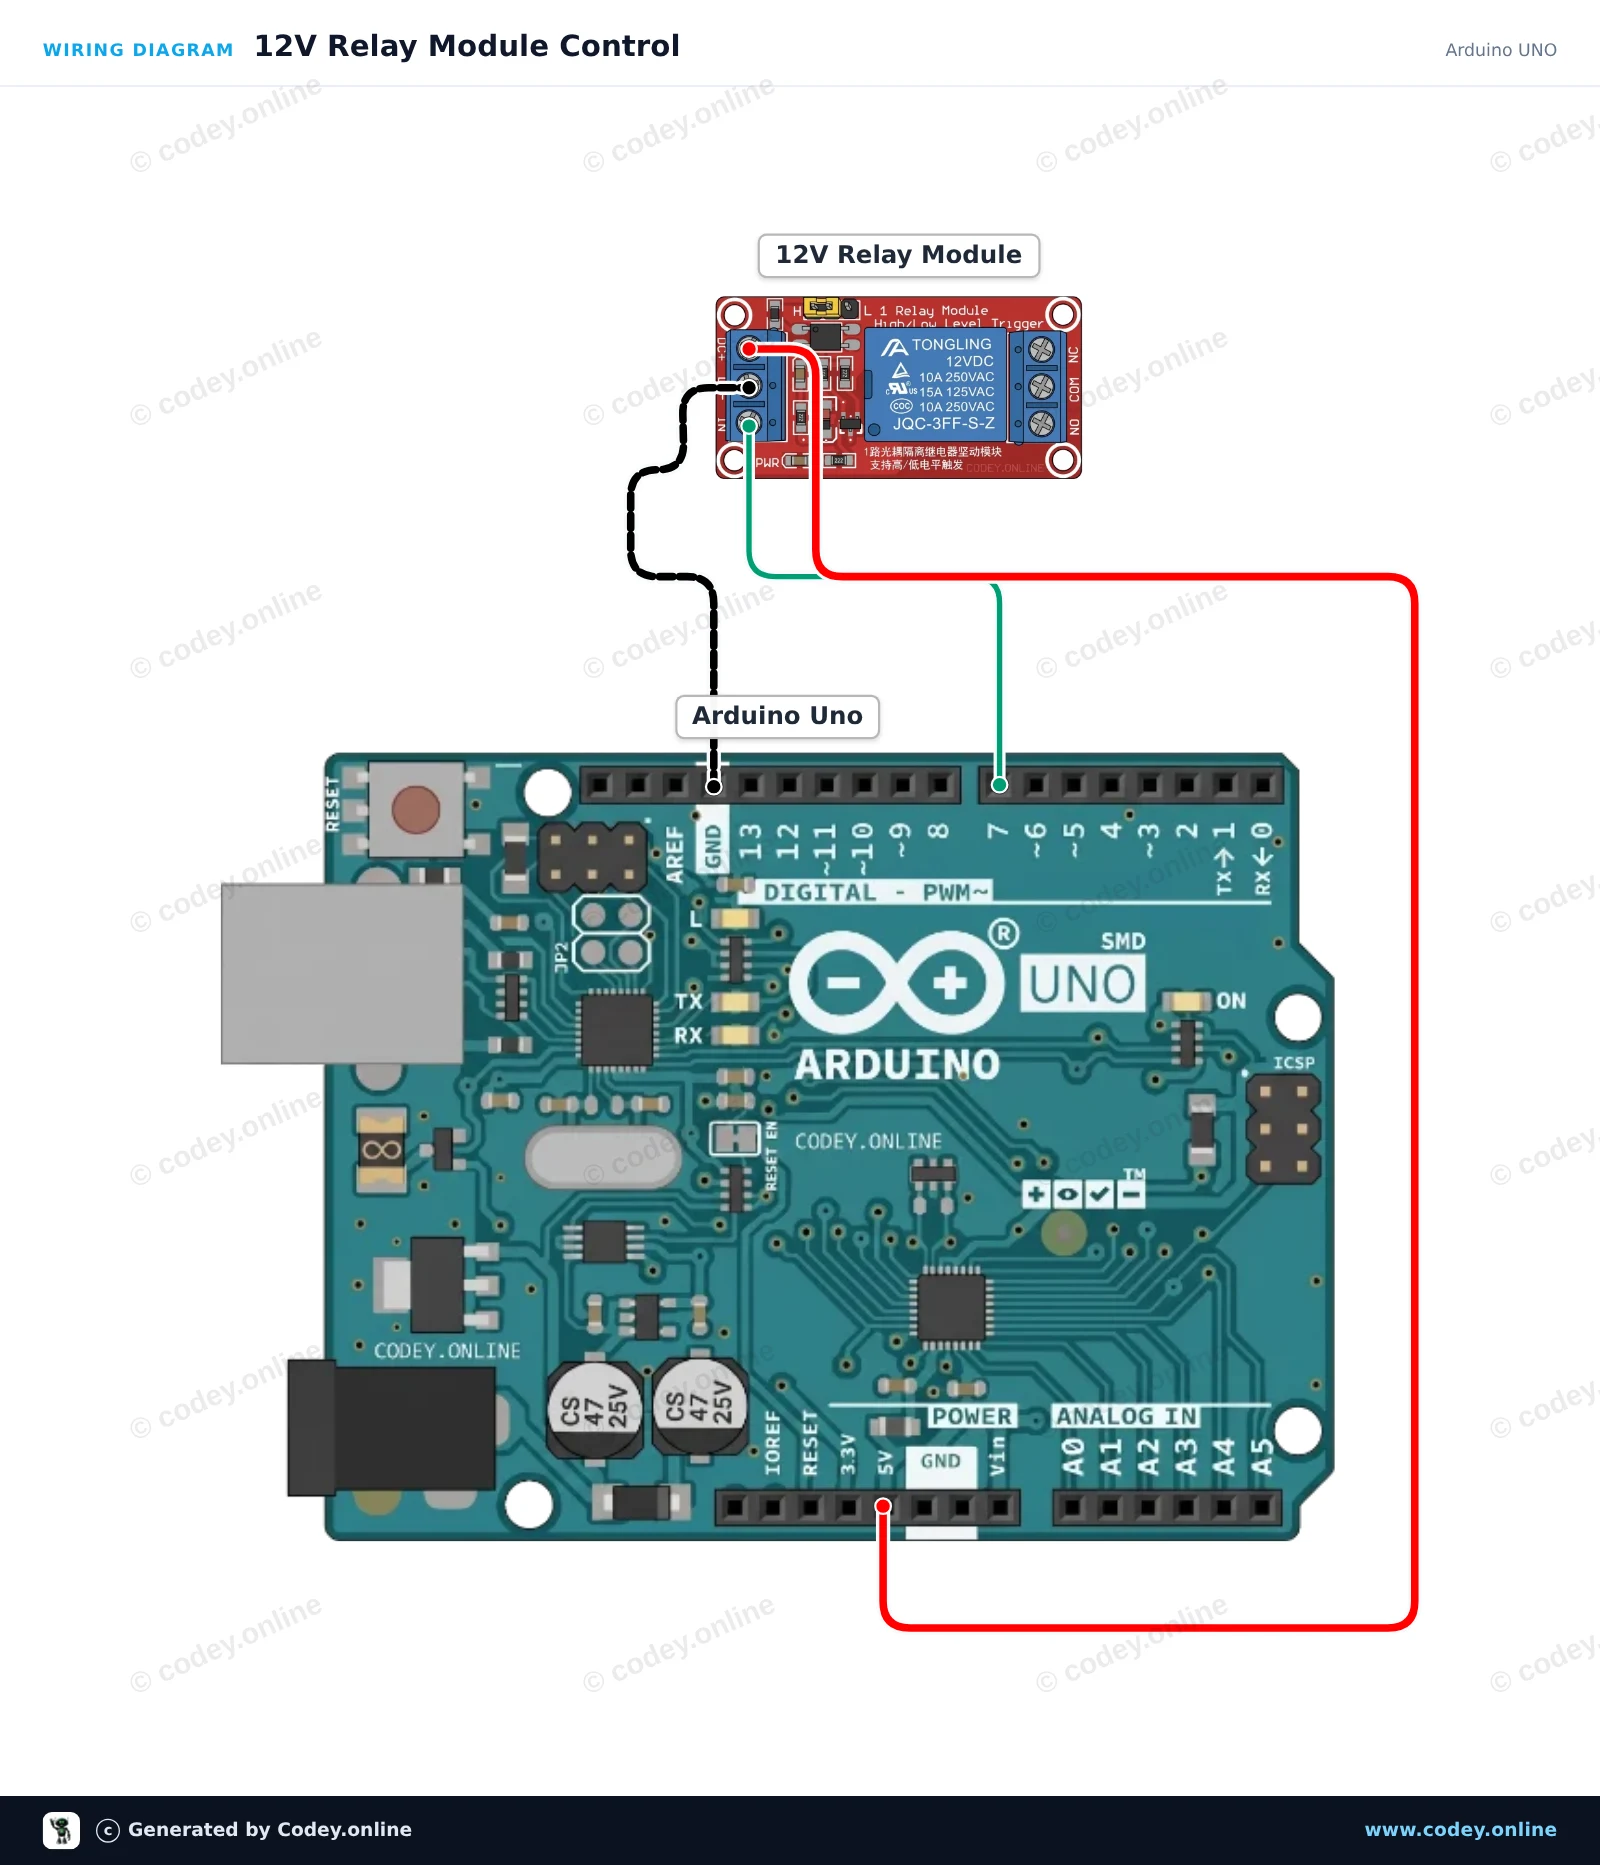
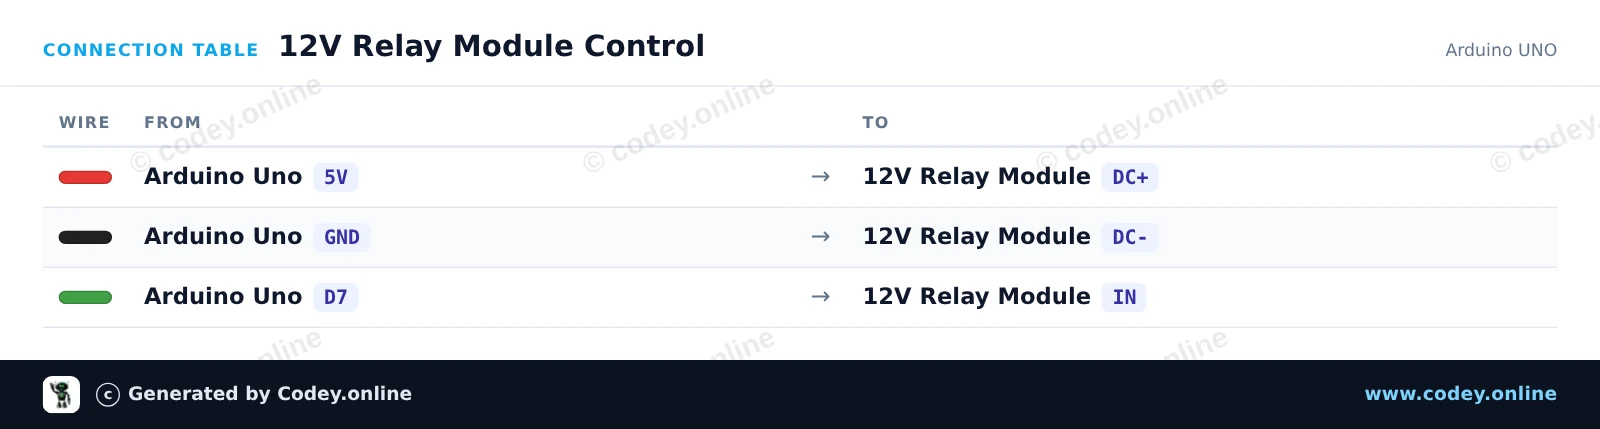
Αυτό το project δείχνει πώς να ελέγξετε μια μονάδα ρελέ 12V με ένα Arduino Uno. Το sketch ενεργοποιεί και απενεργοποιεί περιοδικά το ρελέ κάθε 2 δευτερόλεπτα, εμφανίζοντας την τρέχουσα κατάσταση στο Serial Monitor. Μια ενσωματωμένη ένδειξη LED στη μονάδα θα ανάψει όταν το ρελέ ενεργοποιηθεί.
/*
 * ==================================================================
 *  Generated by Codey.online  —  https://www.codey.online
 * ==================================================================
 *  Project   : 12V Relay Module Control
 *  Board     : Arduino UNO (arduino:avr:uno)
 *  Parts     : Relais Module 12v AC250V 10A Relais 12v 1 relais LED indicator
 *  Libraries : none (built-in)
 *
 *  Codey Online is an AI-powered browser IDE for Arduino and ESP32.
 *  Describe your project and Codey writes the code, draws the wiring
 *  diagram and uploads it to your board, straight from the browser.
 *  This code is free to use, modify and share, without warranty.
 * ==================================================================
 */

// Pin configuration
const int RELAY_PIN = 7;

void setup() {
  // Initialize serial communication
  Serial.begin(115200);
  while (!Serial) {
    ; // Wait for serial port to connect
  }

  // Configure relay control pin
  pinMode(RELAY_PIN, OUTPUT);
  digitalWrite(RELAY_PIN, HIGH); // Default off (active-low module)

  Serial.println(F("12V Relay Module Demo Initialized"));
}

void loop() {
  // Activate relay (Low-level trigger)
  Serial.println(F("Relay: ON"));
  digitalWrite(RELAY_PIN, LOW);
  delay(2000);

  // Deactivate relay
  Serial.println(F("Relay: OFF"));
  digitalWrite(RELAY_PIN, HIGH);
  delay(2000);
}Wiring diagram and example code generated by Codey.online — https://www.codey.online
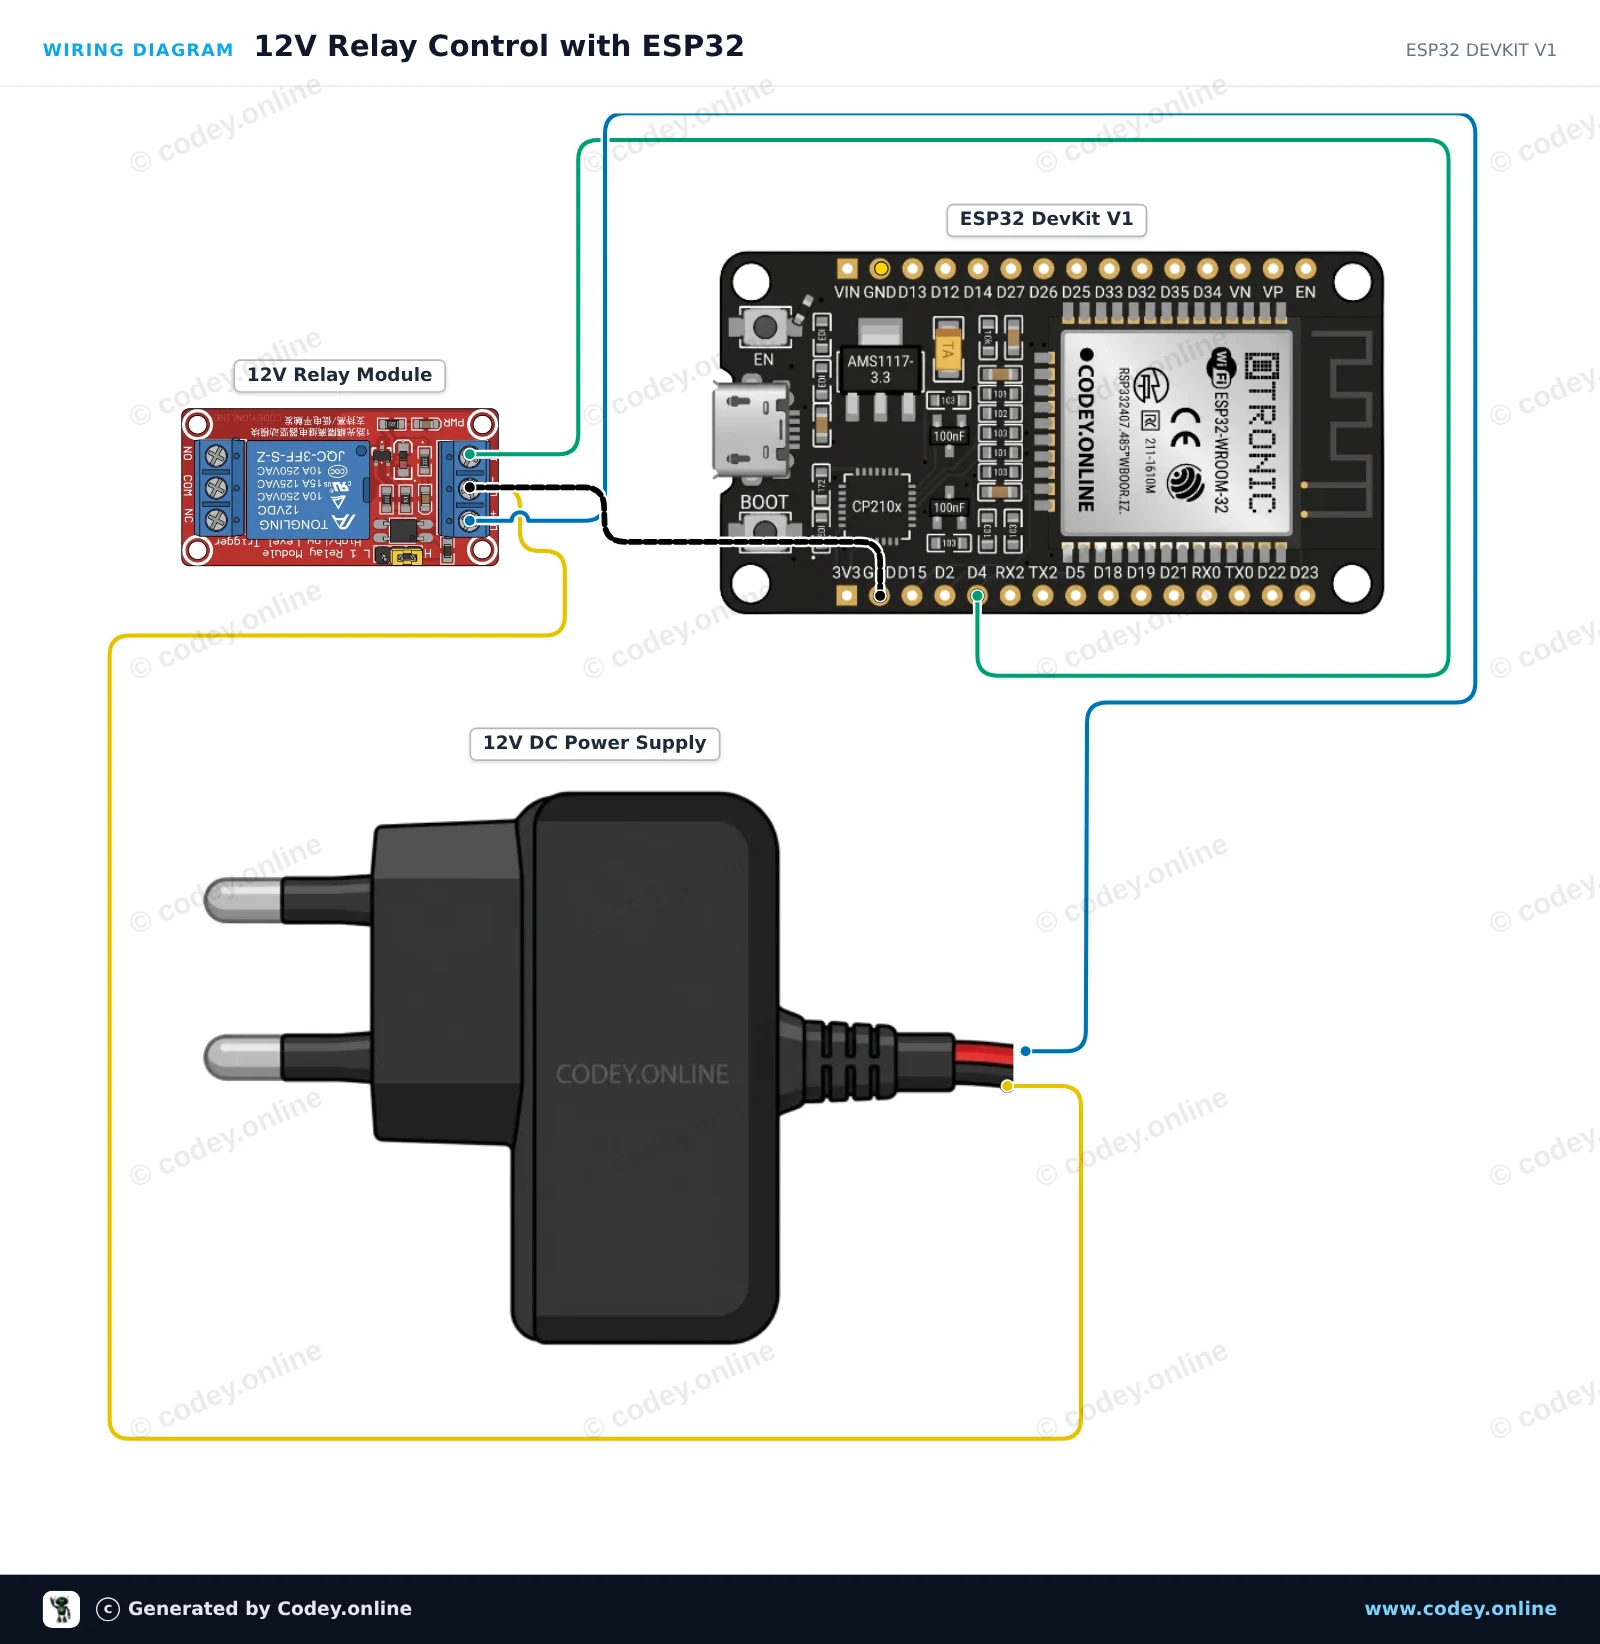
Αυτό το έργο δείχνει πώς να ελέγχετε ένα μονοκάναλο module ρελέ 12V με ένα ESP32. Το πηνίο του ρελέ τροφοδοτείται από εξωτερική τροφοδοσία 12V DC με κοινή γείωση με το ESP32, και το GPIO 4 ενεργοποιεί και απενεργοποιεί το ρελέ κάθε δύο δευτερόλεπτα.
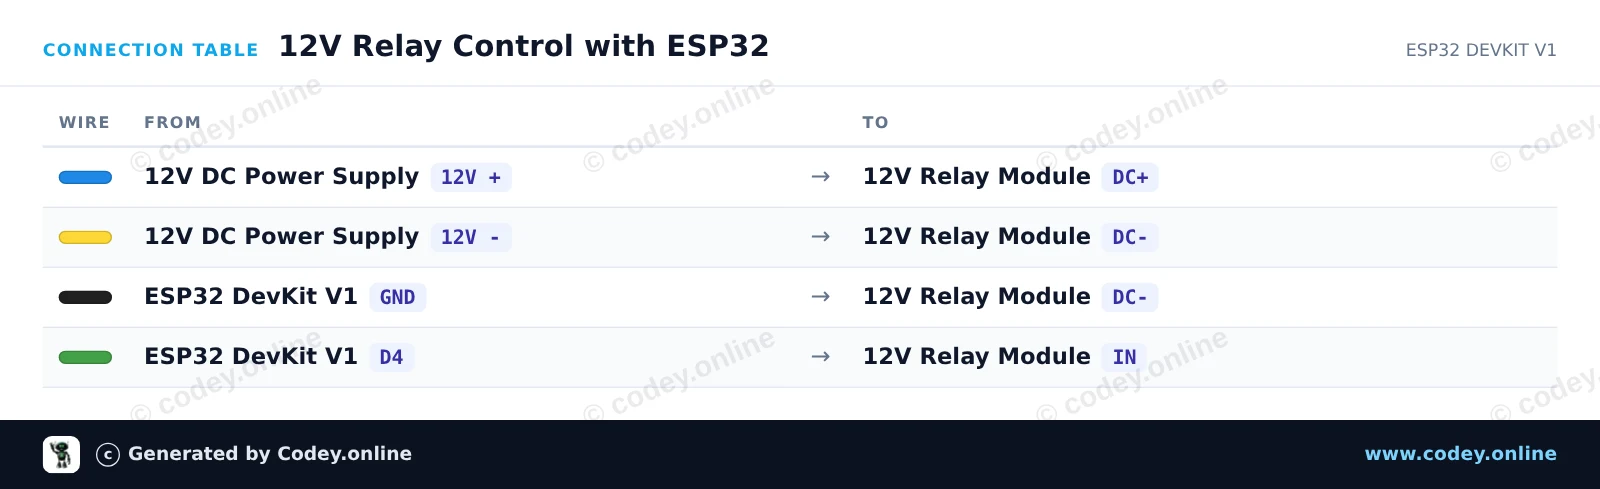
/*
 * ==================================================================
 *  Generated by Codey.online  —  https://www.codey.online
 * ==================================================================
 *  Project   : 12V Relay Control with ESP32
 *  Board     : ESP32 DEVKIT V1 (esp32:esp32:esp32doit-devkit-v1)
 *  Parts     : Relais Module 12v AC250V 10A Relais 12v 1 relais LED indicator
 *  Libraries : none (built-in)
 *
 *  Codey Online is an AI-powered browser IDE for Arduino and ESP32.
 *  Describe your project and Codey writes the code, draws the wiring
 *  diagram and uploads it to your board, straight from the browser.
 *  This code is free to use, modify and share, without warranty.
 * ==================================================================
 */

// Pin connected to relay control input
const int RELAY_PIN = 4;

void setup() {
  Serial.begin(115200);

  // Configure relay pin as output
  pinMode(RELAY_PIN, OUTPUT);
  digitalWrite(RELAY_PIN, LOW);

  Serial.println("ESP32 12V Relay Demo Started");
}

void loop() {
  // Turn relay ON
  Serial.println("Relay ON");
  digitalWrite(RELAY_PIN, HIGH);
  delay(2000);

  // Turn relay OFF
  Serial.println("Relay OFF");
  digitalWrite(RELAY_PIN, LOW);
  delay(2000);
}Wiring diagram and example code generated by Codey.online — https://www.codey.online






 English
  Nederlands
  Frans
Frans  Deutsch
  Italiano
  Español
  Suomi
Suomi  Polski
  Dansk
Dansk  Български
  Čeština
  Hrvatski
  Svenska
  Aileen