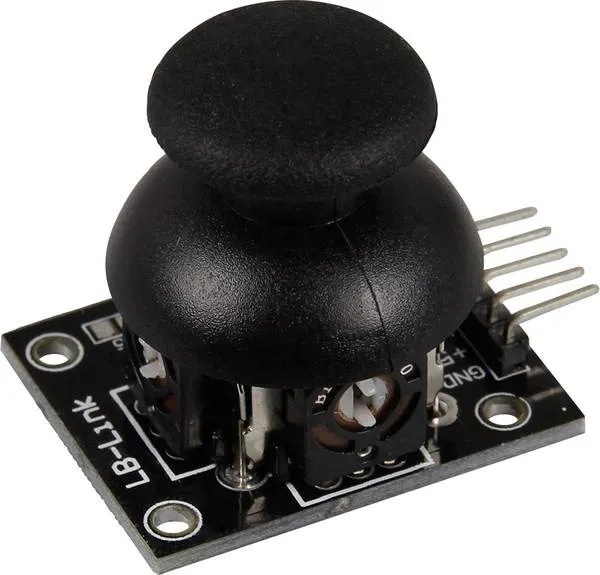

SKU: OT620-B36 Αριθμός είδους: YQ939 EAN: 8720828223031

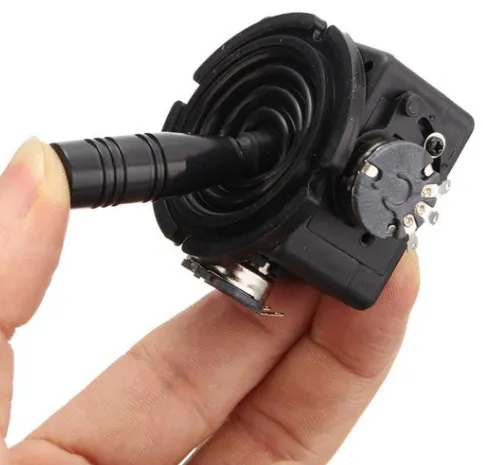
Με αυτή την πλακέτα μπορούν να εμφανιστούν οι θέσεις X και Y του joystick ως αναλογική τάση στις ακίδες εξόδου. Κατάλληλο για έργα με Arduino, Raspberry Pi, ESP8266 ή ESP32.
δείτε εδώ το Διάγραμμα σύνδεσης και τον κώδικα παραδείγματος >>>
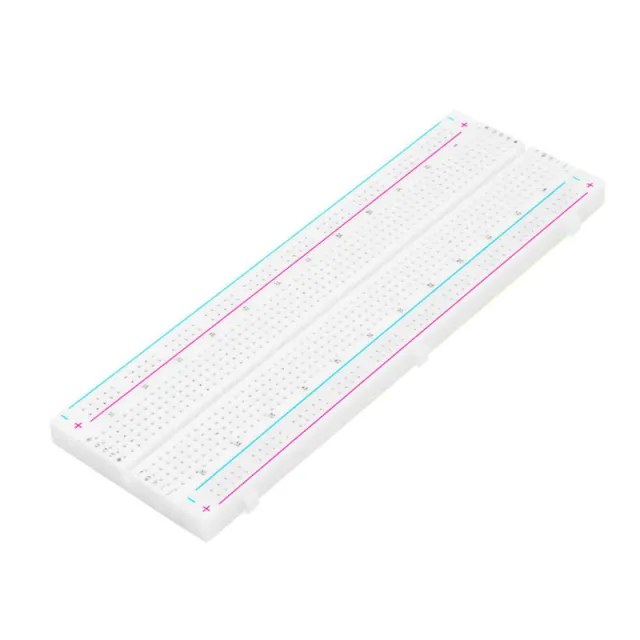
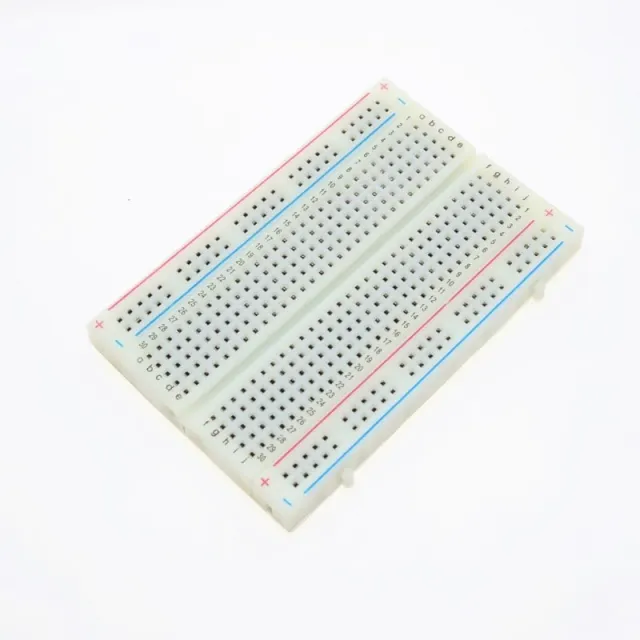
Η μονάδα μπορεί να κολληθεί ή να χρησιμοποιηθεί σε breadboard.
Εύρος τάσης: 0 - 5 V
Τάση λειτουργίας: 3,3 - 5V
Διαστάσεις: 34 x 39 x 26 mm
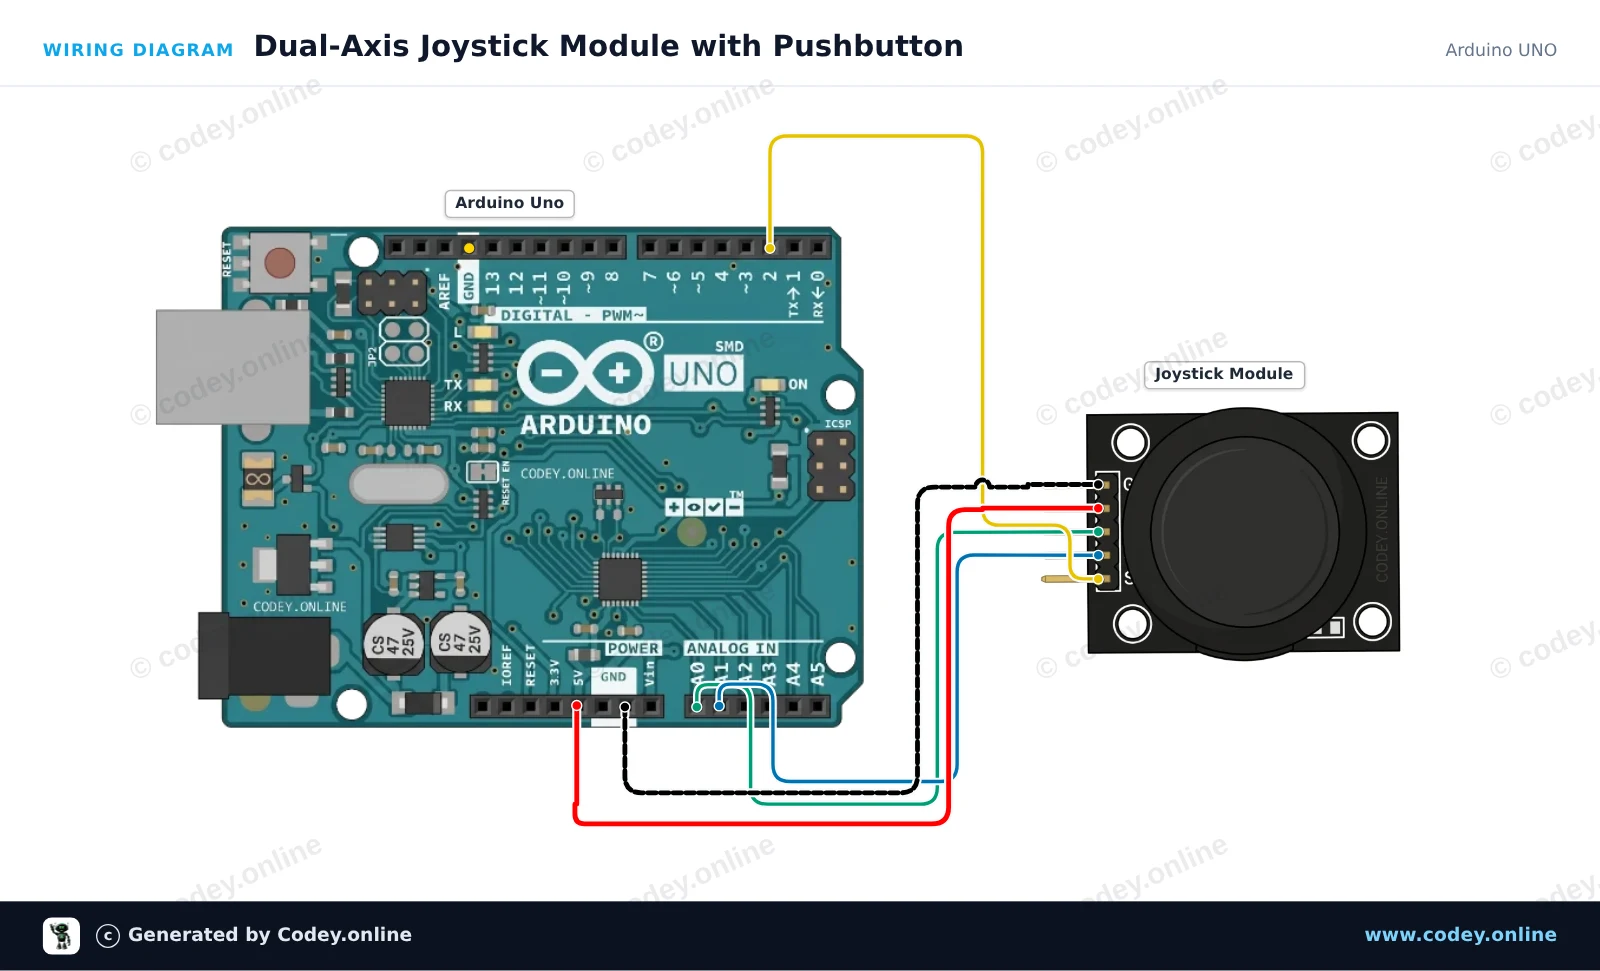
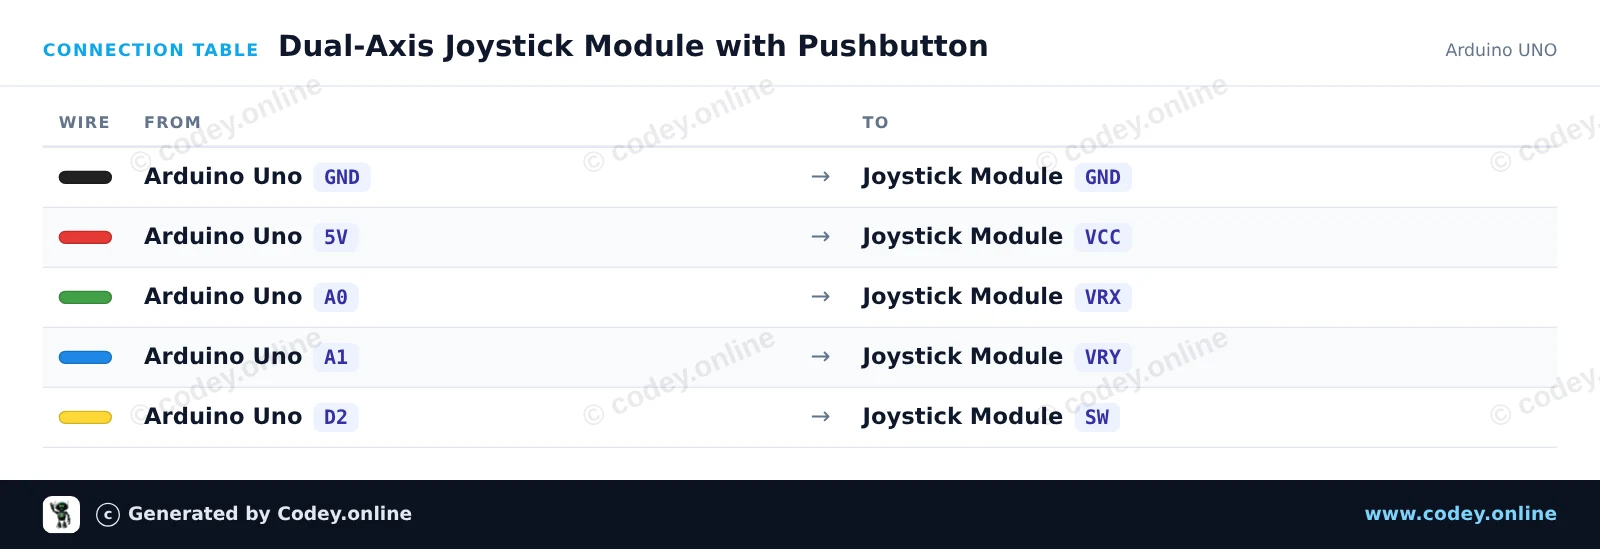
Έτσι συνδέεις το Μονάδα joystick σε ένα Arduino UNO ή ESP32, με ένα παράδειγμα sketch που μπορείς να ανεβάσεις αμέσως.
Αυτό το παράδειγμα διαβάζει τις αναλογικές θέσεις των αξόνων X και Y μαζί με το ενσωματωμένο κουμπί πίεσης της μονάδας joystick. Μετακινήστε το stick ή πιέστε το προς τα κάτω για να δείτε σε πραγματικό χρόνο τις τιμές θέσης και την κατάσταση του κουμπιού στο Serial Monitor.
/*
 * ==================================================================
 *  Generated by Codey.online  —  https://www.codey.online
 * ==================================================================
 *  Project   : Dual-Axis Joystick Module with Pushbutton
 *  Board     : Arduino UNO (arduino:avr:uno)
 *  Parts     : Joystick module
 *  Libraries : none (built-in)
 *
 *  Codey Online is an AI-powered browser IDE for Arduino and ESP32.
 *  Describe your project and Codey writes the code, draws the wiring
 *  diagram and uploads it to your board, straight from the browser.
 *  This code is free to use, modify and share, without warranty.
 * ==================================================================
 */

// Pin definitions
const int PIN_X = A0;
const int PIN_Y = A1;
const int PIN_SW = 2;

void setup() {
  // Enable internal pull-up resistor for the integrated pushbutton
  pinMode(PIN_SW, INPUT_PULLUP);

  Serial.begin(115200);
  Serial.println(F("Joystick Module Demo"));
  Serial.println(F("--------------------"));
}

void loop() {
  // Read analog values for X and Y axes (range: 0 - 1023)
  int xVal = analogRead(PIN_X);
  int yVal = analogRead(PIN_Y);

  // Button is active-low (reads LOW when pressed)
  bool isPressed = (digitalRead(PIN_SW) == LOW);

  // Print the results to Serial Monitor
  Serial.print(F("X: "));
  Serial.print(xVal);
  Serial.print(F(" | Y: "));
  Serial.print(yVal);
  Serial.print(F(" | Button: "));
  Serial.println(isPressed ? F("PRESSED") : F("RELEASED"));

  delay(150);
}Wiring diagram and example code generated by Codey.online — https://www.codey.online
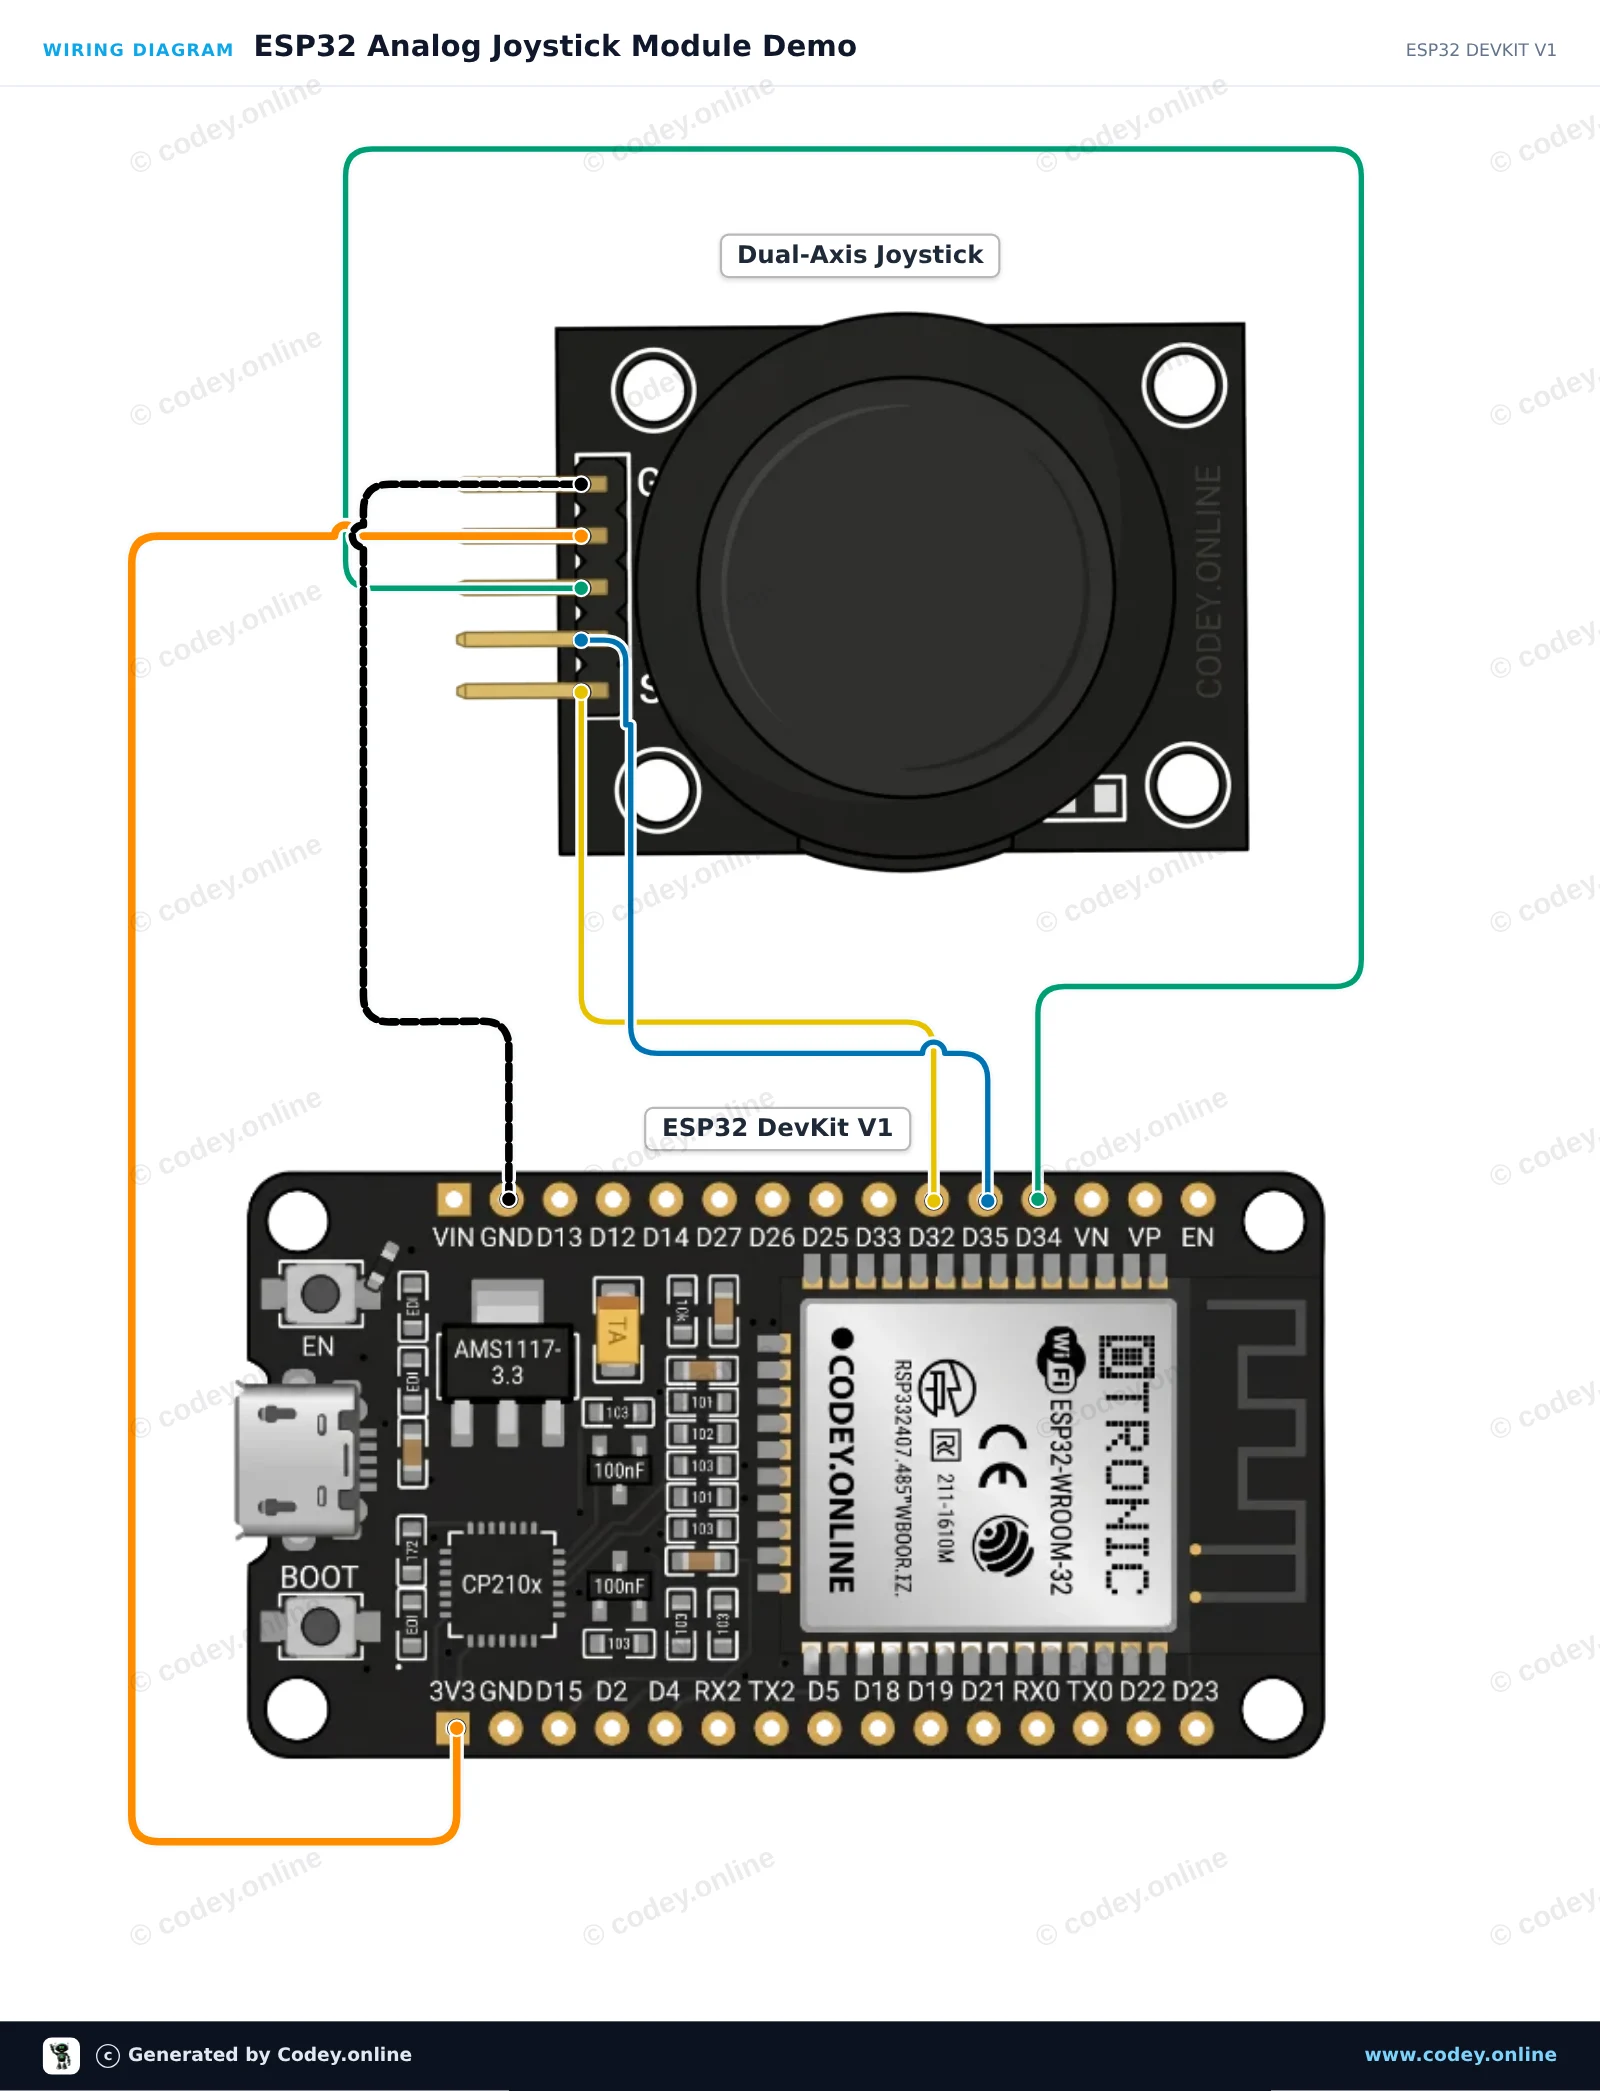
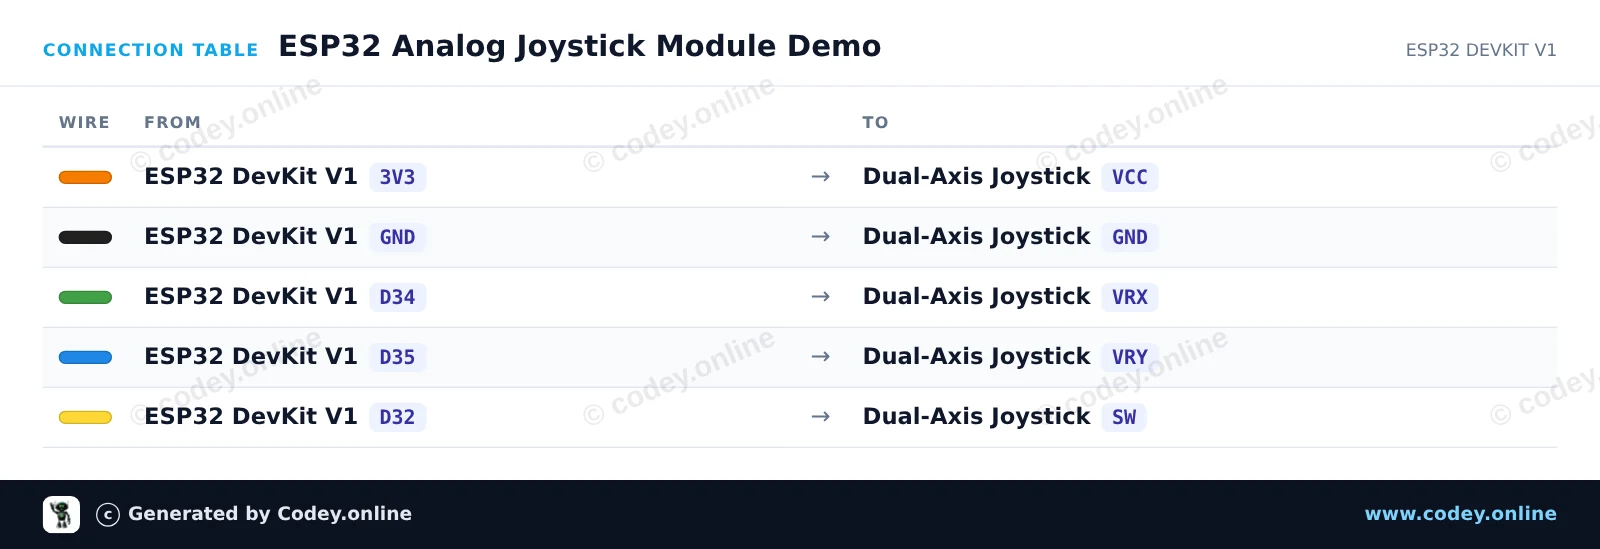
Αυτό το έργο διαβάζει τις θέσεις X και Y καθώς και την κατάσταση του ενσωματωμένου κουμπιού από μια αναλογική μονάδα joystick δύο αξόνων. Το ESP32 διαβάζει αναλογικές τάσεις μέσω των GPIO 34 και 35, και την κατάσταση του κουμπιού μέσω του GPIO 32. Ανοίξτε το Serial Monitor στα 115200 baud για να δείτε σε πραγματικό χρόνο τις συντεταγμένες του joystick και τα πατήματα του κουμπιού.
/*
 * ==================================================================
 *  Generated by Codey.online  —  https://www.codey.online
 * ==================================================================
 *  Project   : ESP32 Analog Joystick Module Demo
 *  Board     : ESP32 DEVKIT V1 (esp32:esp32:esp32doit-devkit-v1)
 *  Parts     : Joystick module
 *  Libraries : none (built-in)
 *
 *  Codey Online is an AI-powered browser IDE for Arduino and ESP32.
 *  Describe your project and Codey writes the code, draws the wiring
 *  diagram and uploads it to your board, straight from the browser.
 *  This code is free to use, modify and share, without warranty.
 * ==================================================================
 */

// Pin definitions (using bare GPIO numbers for ESP32)
const int pinVRX = 34;
const int pinVRY = 35;
const int pinSW  = 32;

void setup() {
  Serial.begin(115200);

  // Configure push-button pin with internal pull-up
  pinMode(pinSW, INPUT_PULLUP);
}

void loop() {
  // Read analog values from joystick potentiometers (0 - 4095 on ESP32)
  int xVal = analogRead(pinVRX);
  int yVal = analogRead(pinVRY);

  // Read digital state of the integrated switch (LOW when pressed)
  bool isPressed = (digitalRead(pinSW) == LOW);

  // Print the readings to the Serial Monitor
  Serial.print("X: ");
  Serial.print(xVal);
  Serial.print(" | Y: ");
  Serial.print(yVal);
  Serial.print(" | Button: ");
  Serial.println(isPressed ? "PRESSED" : "RELEASED");

  delay(100);
}Wiring diagram and example code generated by Codey.online — https://www.codey.online






 English
  Nederlands
  Frans
Frans  Deutsch
  Italiano
  Español
  Suomi
Suomi  Polski
  Dansk
Dansk  Български
  Čeština
  Hrvatski
  Svenska
  Aileen