SKU: OT2085-B118 Αριθμός είδους: NA171 EAN: 8126478667001

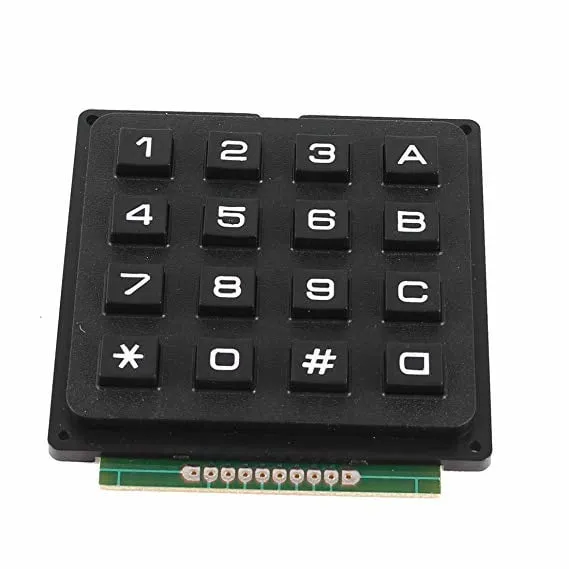
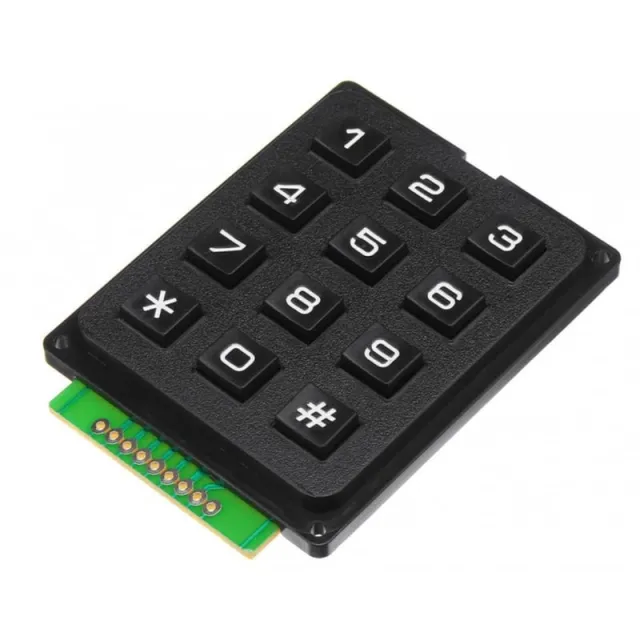
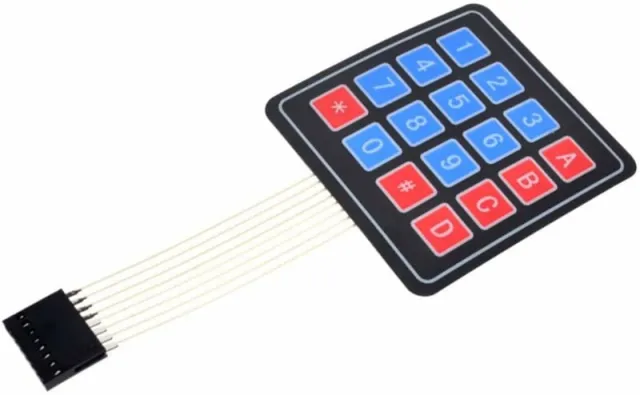
Πληκτρολόγιο με πλαστικά πλήκτρα. Ιδανικό για παράδειγμα για την εισαγωγή κωδικού πρόσβασης.
Το πληκτρολόγιο διαθέτει διακοπτές μεμβράνης και όλα τα κουμπιά φέρουν αρίθμηση από 0-9, καθώς και τα σύμβολα * και #. Στα δεξιά υπάρχουν ακόμη 4 κουμπιά με A,B,C και D
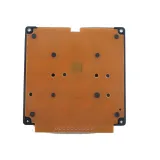
Η μονάδα είναι πολύ κατάλληλη για ενσωμάτωση. Στη μονάδα υπάρχουν επίσης τέσσερις οπές 2mm για στερέωση.
Διαστάσεις
Μήκος: 6,9cm
Πλάτος: 6,5cm
Ύψος: 1cm
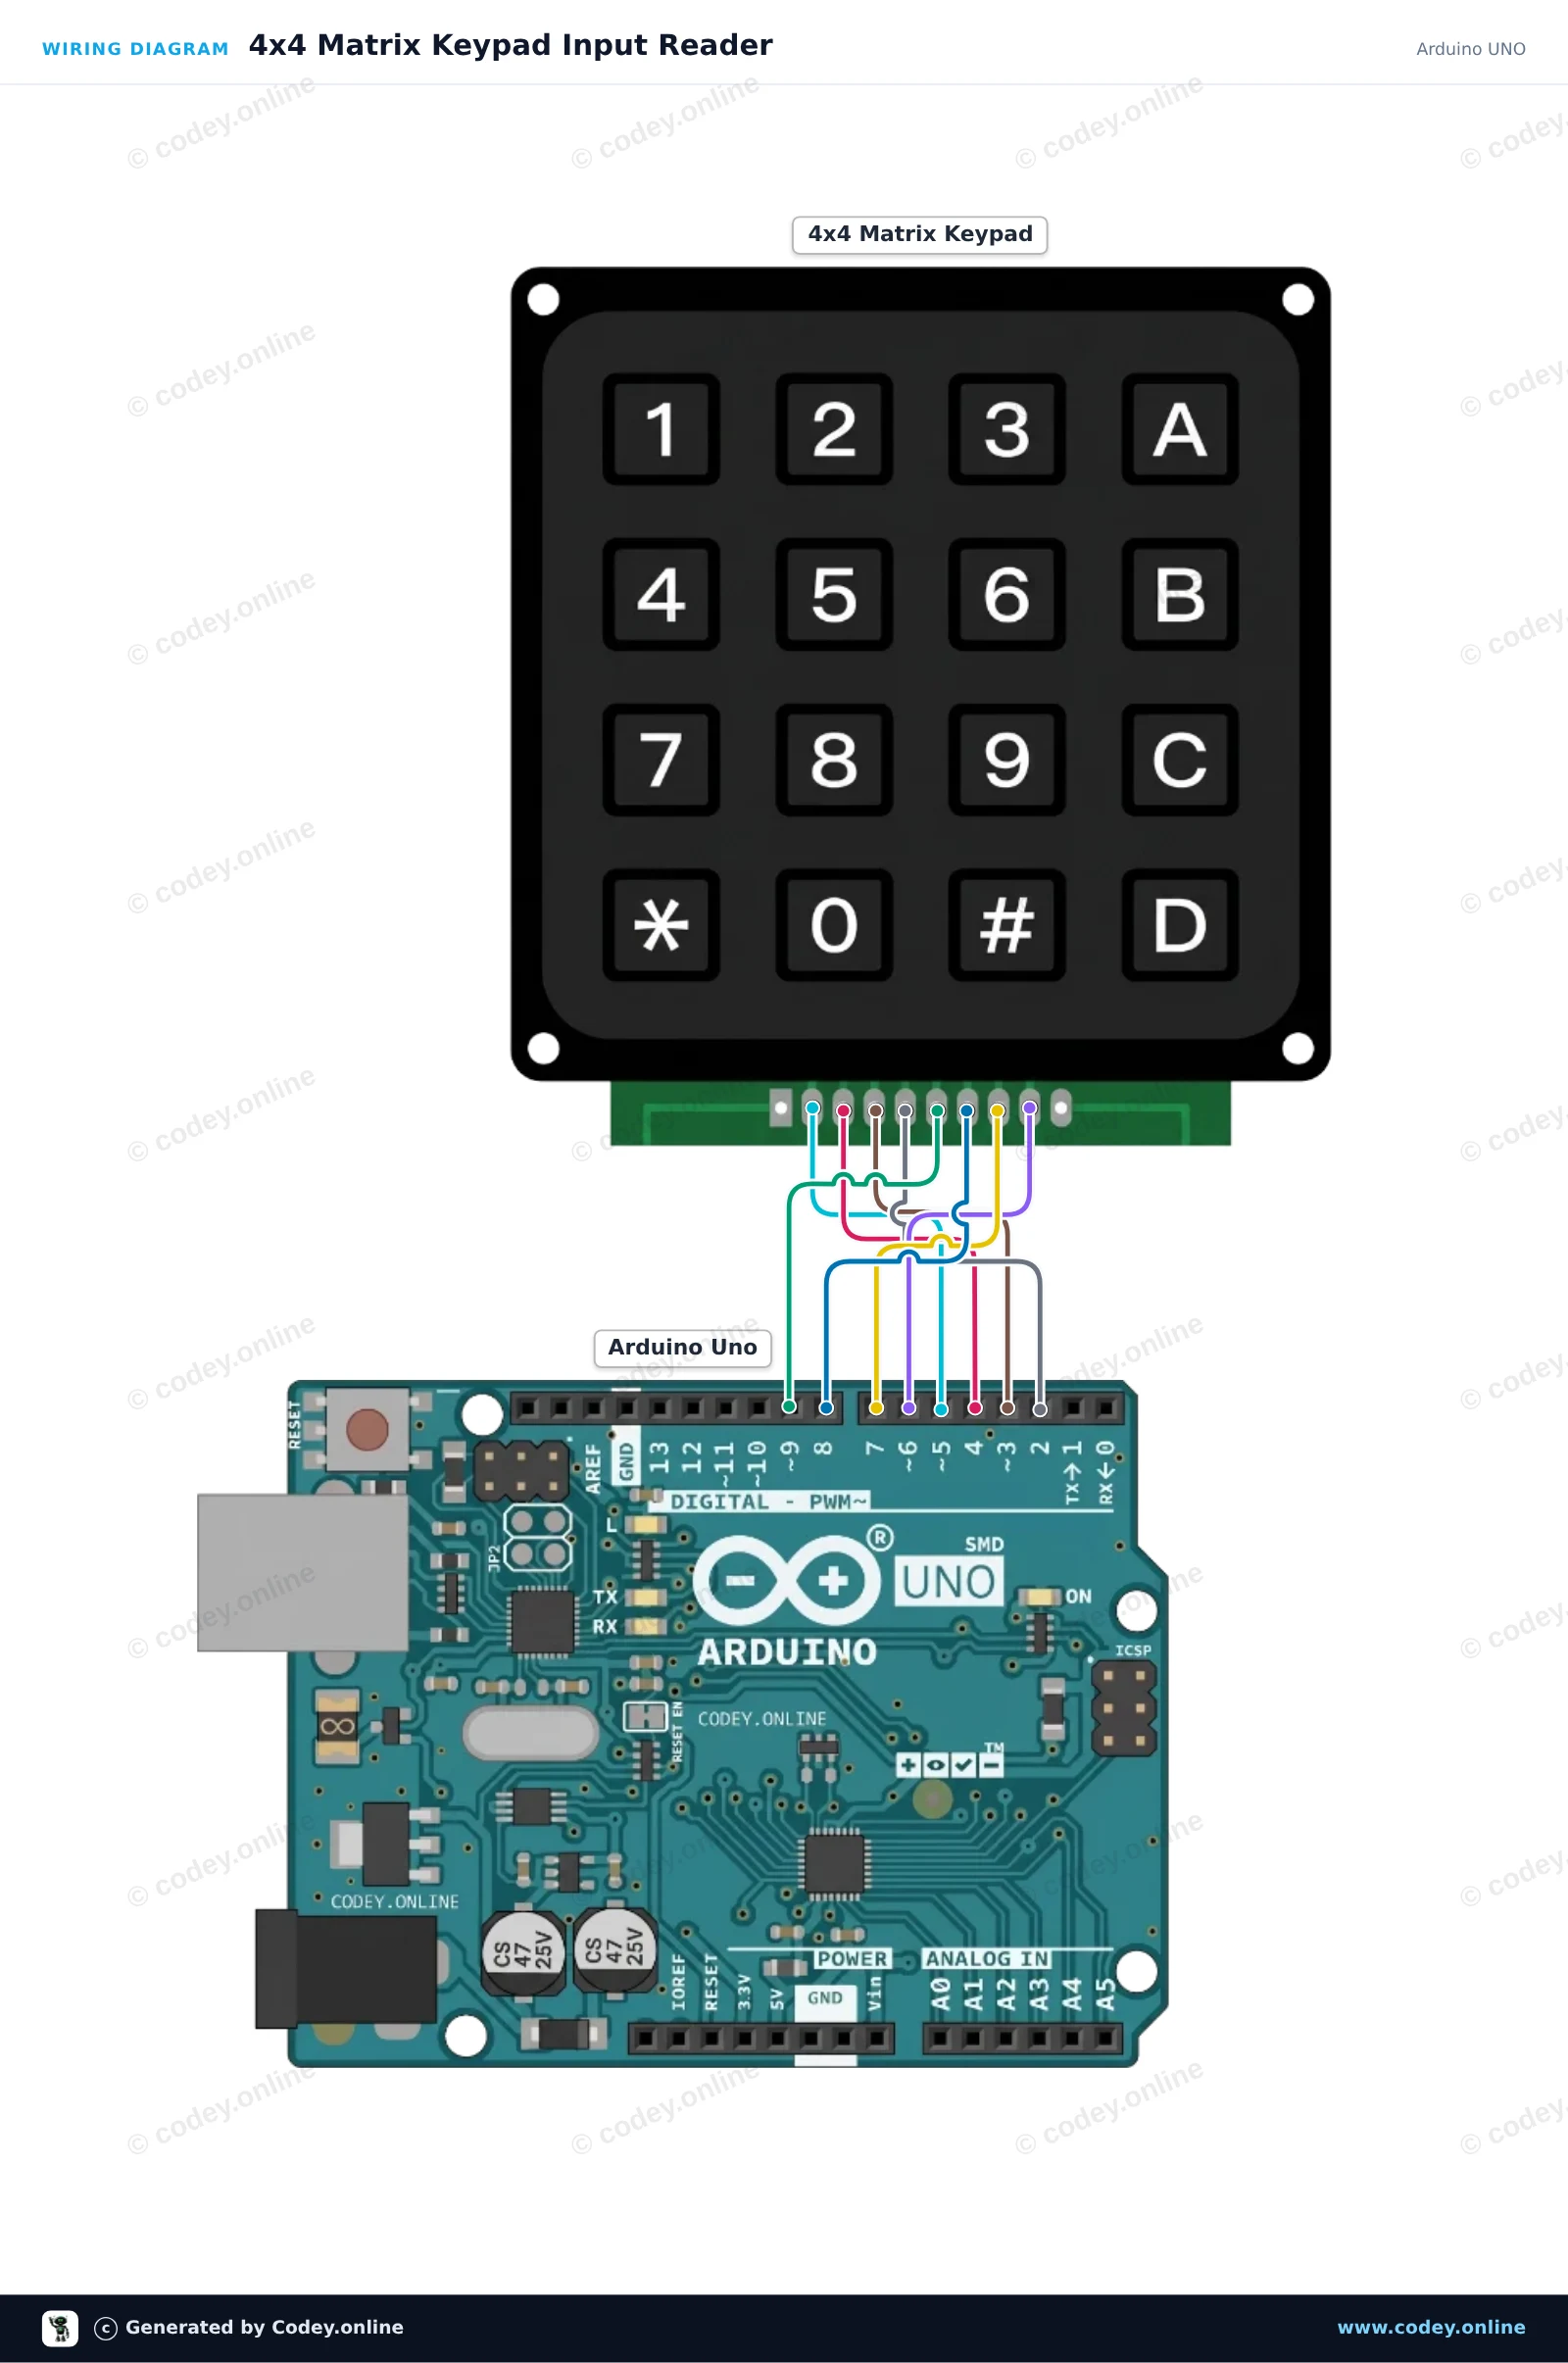
Έτσι συνδέεις το μαύρο πληκτρολόγιο μήτρας 4x4 σε ένα Arduino UNO ή ESP32, με ένα παράδειγμα sketch που μπορείς να ανεβάσεις αμέσως.
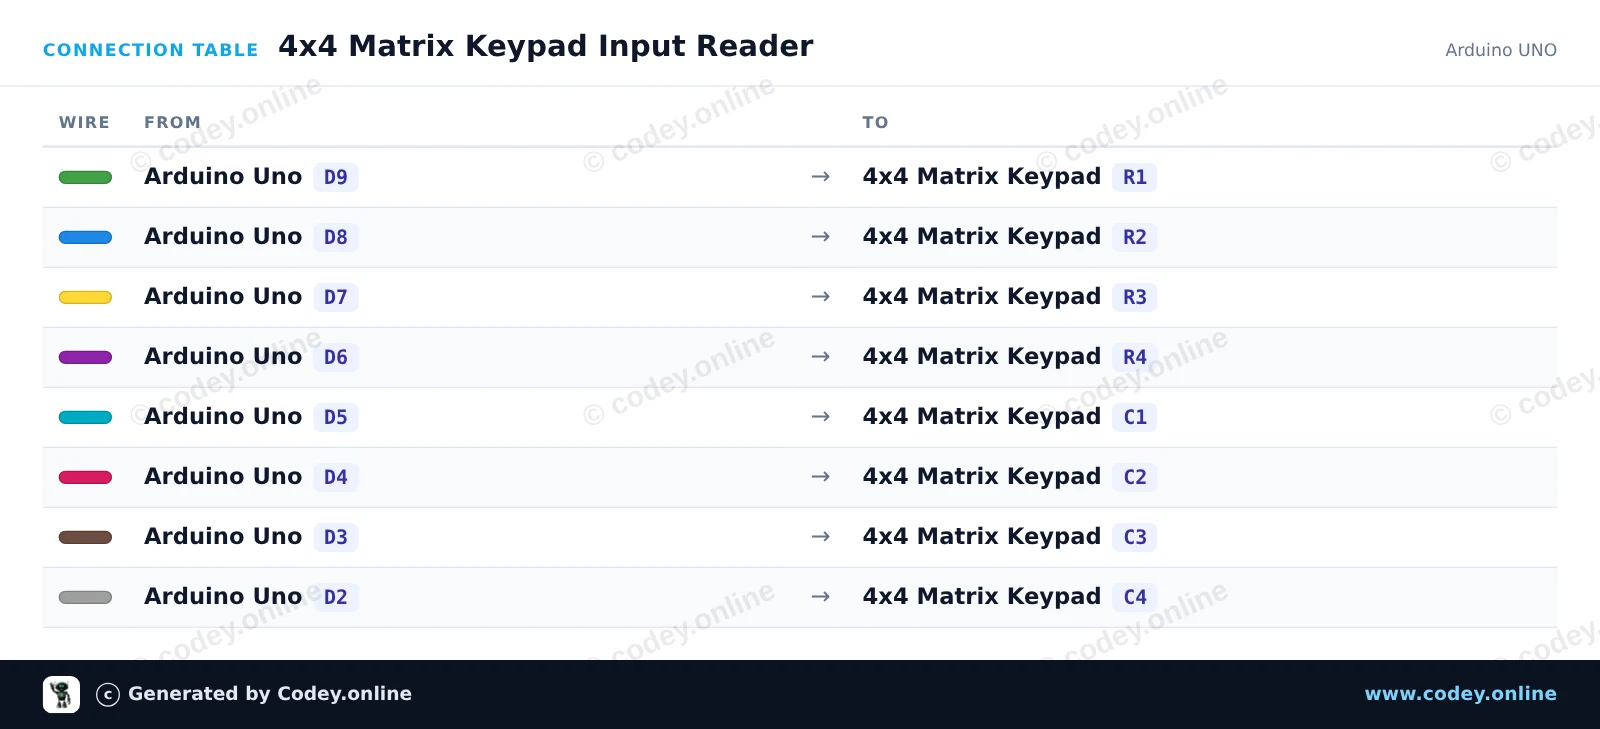
Αυτό το project δείχνει πώς να διαβάζετε εισόδους από ένα πληκτρολόγιο μήτρας 4x4 με ένα Arduino Uno. Όταν πατηθεί οποιοδήποτε κουμπί στο πληκτρολόγιο, ο αντίστοιχος χαρακτήρας εμφανίζεται απευθείας στο Serial Monitor με 115200 baud.
/*
 * ==================================================================
 *  Generated by Codey.online  —  https://www.codey.online
 * ==================================================================
 *  Project   : 4x4 Matrix Keypad Input Reader
 *  Board     : Arduino UNO (arduino:avr:uno)
 *  Parts     : Keypad 4x4
 *  Libraries : Keypad 3.1.1
 *
 *  Codey Online is an AI-powered browser IDE for Arduino and ESP32.
 *  Describe your project and Codey writes the code, draws the wiring
 *  diagram and uploads it to your board, straight from the browser.
 *  This code is free to use, modify and share, without warranty.
 * ==================================================================
 */

#include <Keypad.h>

const byte ROWS = 4;
const byte COLS = 4;

char keys[ROWS][COLS] = {
  {'1', '2', '3', 'A'},
  {'4', '5', '6', 'B'},
  {'7', '8', '9', 'C'},
  {'*', '0', '#', 'D'}
};

byte rowPins[ROWS] = {9, 8, 7, 6};
byte colPins[COLS] = {5, 4, 3, 2};

Keypad keypad = Keypad(makeKeymap(keys), rowPins, colPins, ROWS, COLS);

void setup() {
  Serial.begin(115200);
  Serial.println(F("4x4 Keypad Demo"));
  Serial.println(F("Press any key on the keypad..."));
}

void loop() {
  char key = keypad.getKey();

  if (key) {
    Serial.print(F("Key Pressed: "));
    Serial.println(key);
  }
}Απαραίτητες βιβλιοθήκες: Keypad 3.1.1
Wiring diagram and example code generated by Codey.online — https://www.codey.online
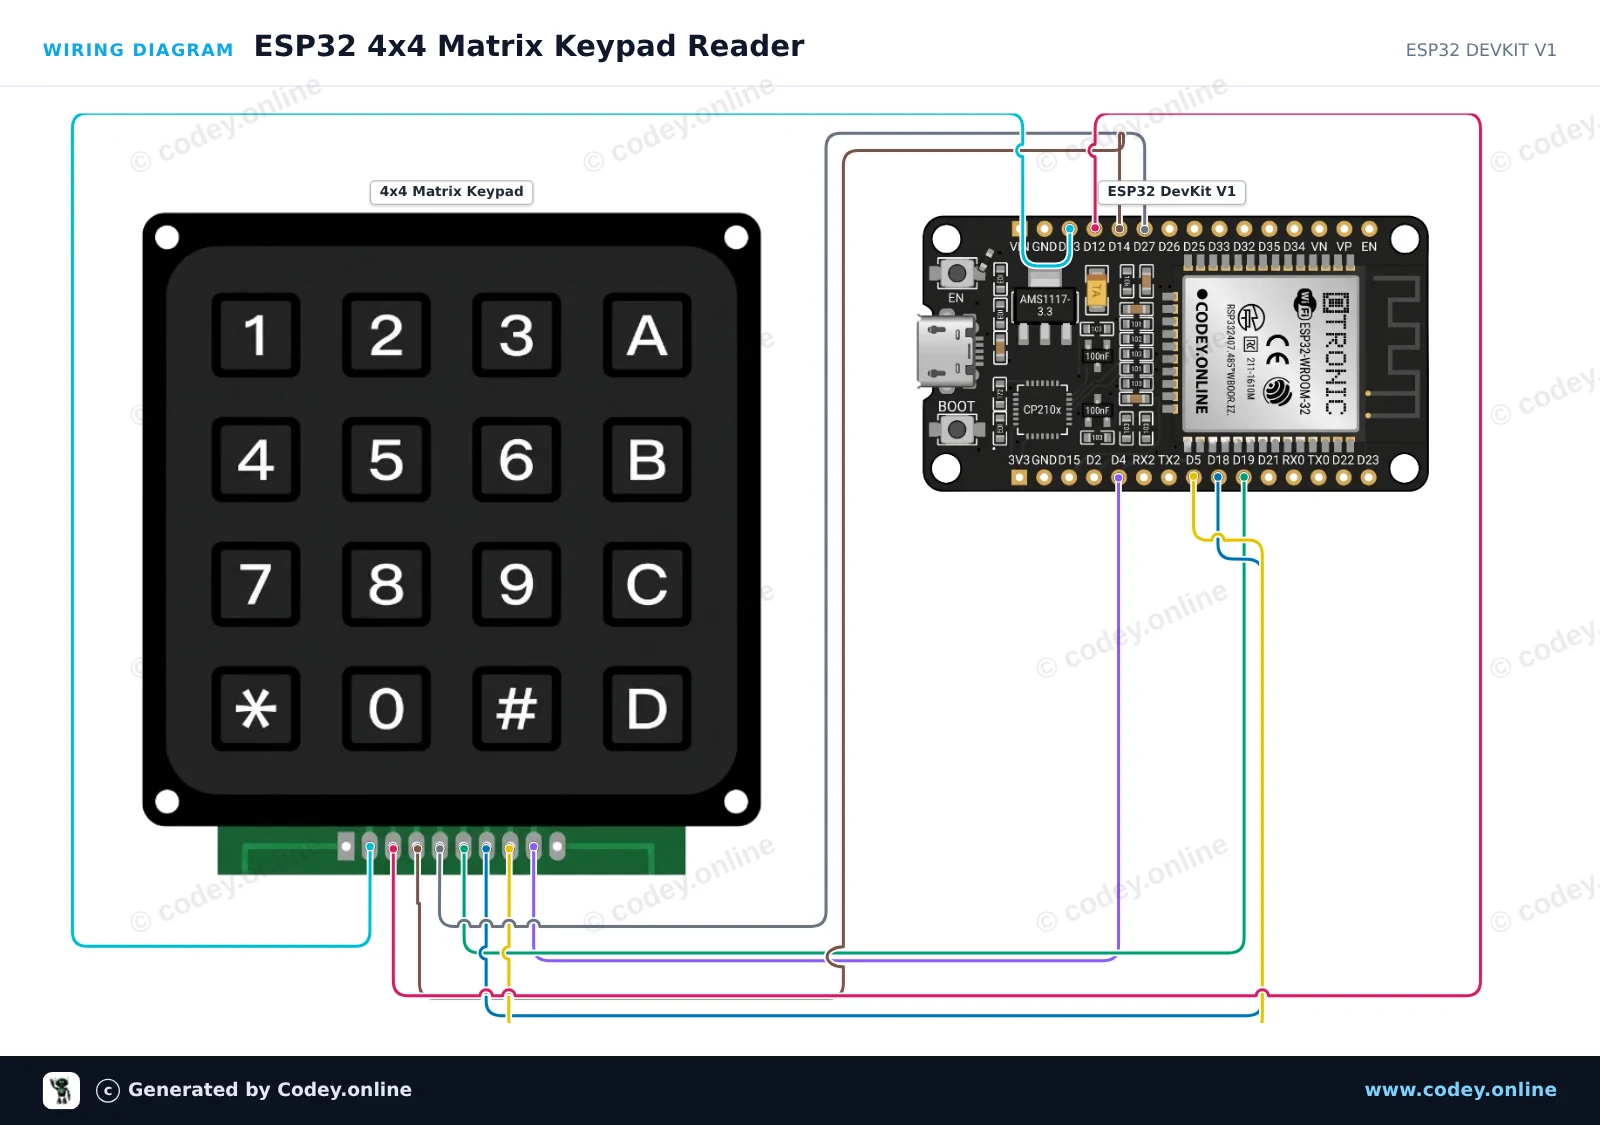
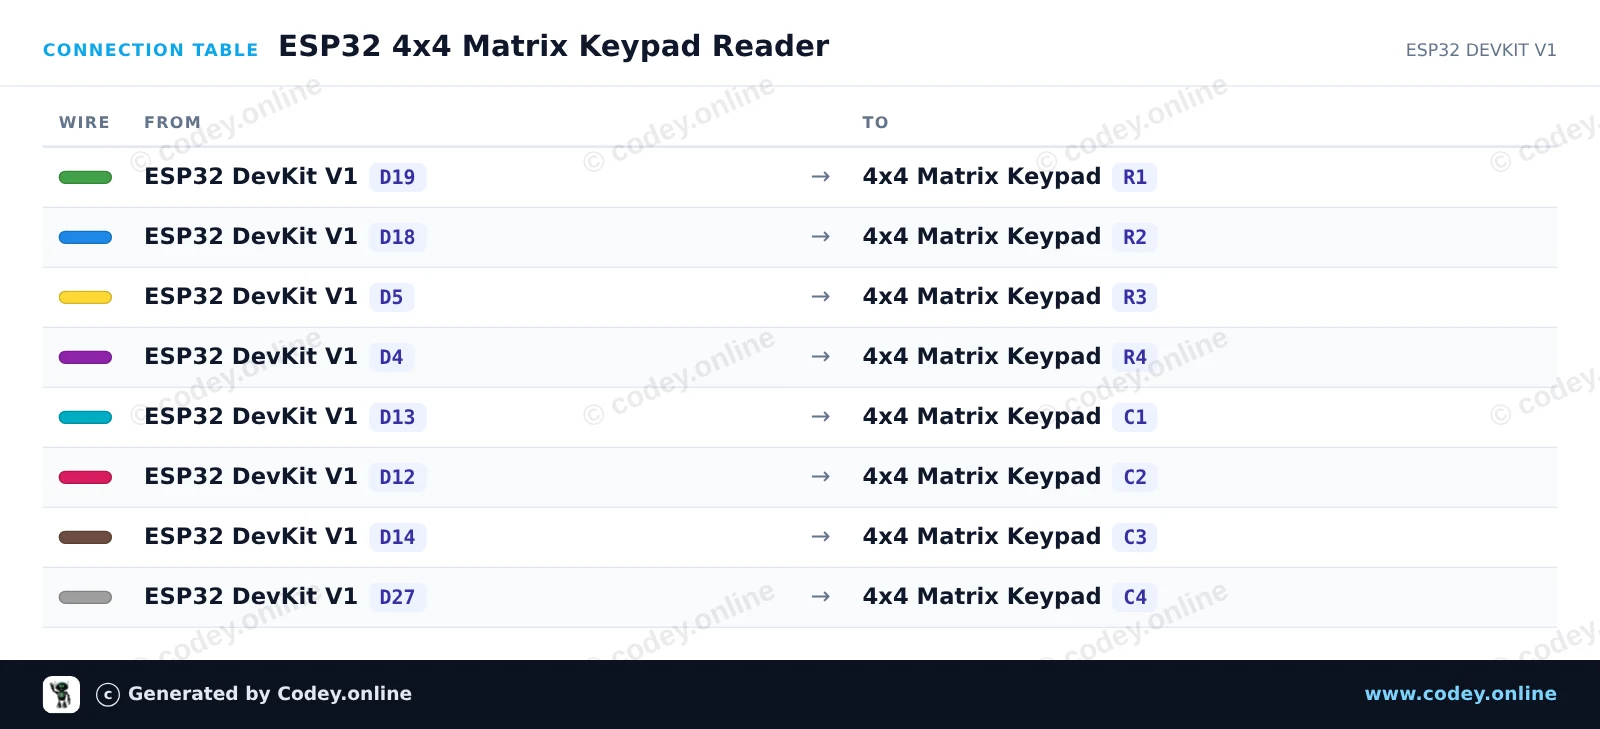
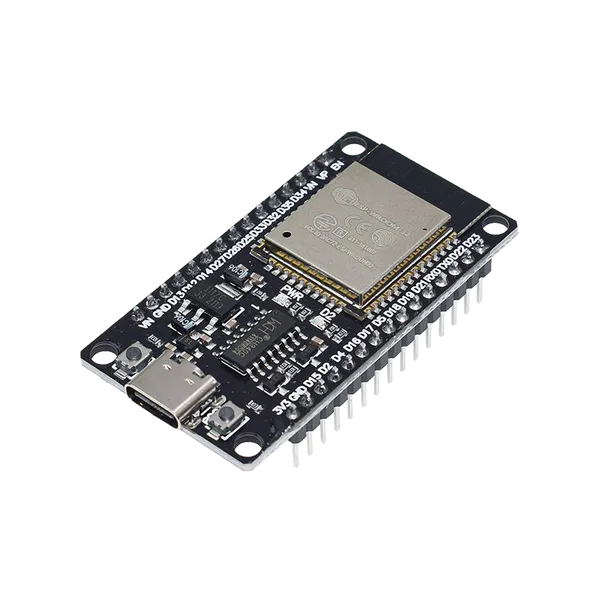
Αυτό το κύκλωμα συνδέει ένα πληκτρολόγιο μήτρας 4x4 απευθείας στα GPIO του ESP32. Η Keypad library σαρώνει τις γραμμές και τις στήλες της μήτρας χρησιμοποιώντας εσωτερικές αντιστάσεις pull-up. Πατώντας οποιοδήποτε πλήκτρο, ο χαρακτήρας του εμφανίζεται σε πραγματικό χρόνο στο Serial Monitor.
/*
 * ==================================================================
 *  Generated by Codey.online  —  https://www.codey.online
 * ==================================================================
 *  Project   : ESP32 4x4 Matrix Keypad Reader
 *  Board     : ESP32 DEVKIT V1 (esp32:esp32:esp32doit-devkit-v1)
 *  Parts     : Keypad 4x4
 *  Libraries : Keypad 3.1.1
 *
 *  Codey Online is an AI-powered browser IDE for Arduino and ESP32.
 *  Describe your project and Codey writes the code, draws the wiring
 *  diagram and uploads it to your board, straight from the browser.
 *  This code is free to use, modify and share, without warranty.
 * ==================================================================
 */

#include <Keypad.h>

const byte ROWS = 4;
const byte COLS = 4;

char keys[ROWS][COLS] = {
  {'1', '2', '3', 'A'},
  {'4', '5', '6', 'B'},
  {'7', '8', '9', 'C'},
  {'*', '0', '#', 'D'}
};

byte rowPins[ROWS] = {19, 18, 5, 4};
byte colPins[COLS] = {13, 12, 14, 27};

Keypad keypad = Keypad(makeKeymap(keys), rowPins, colPins, ROWS, COLS);

void setup() {
  Serial.begin(115200);
  Serial.println("4x4 Keypad Test Ready. Press any key...");
}

void loop() {
  char customKey = keypad.getKey();

  if (customKey) {
    Serial.print("Key pressed: ");
    Serial.println(customKey);
  }
}Απαραίτητες βιβλιοθήκες: Keypad 3.1.1
Wiring diagram and example code generated by Codey.online — https://www.codey.online





 English
  Nederlands
  Frans
Frans  Deutsch
  Italiano
  Español
  Suomi
Suomi  Polski
  Dansk
Dansk  Български
  Čeština
  Hrvatski
  Svenska
  Aileen